• Welcome to the Land Rover UK Forums

    You are currently viewing the site as a guest and some content may not be available to you.

    Registration is quick and easy and will give you full access to the site and allow you to ask questions or make comments and join in on the conversation. If you would like to register then please Register Now

1985 lr90 restoration

listerd

Overdrive!
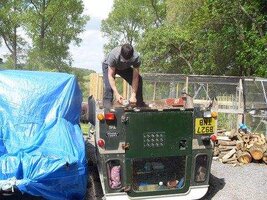
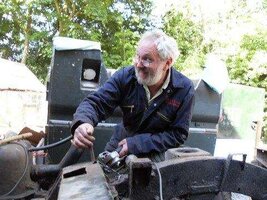
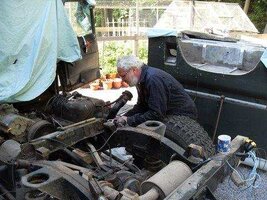
thought i would share some pics of the rebuild so far.

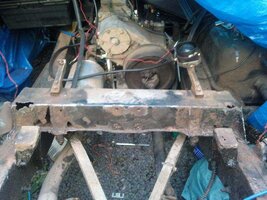
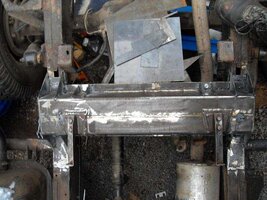
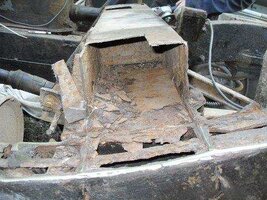
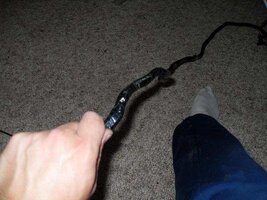
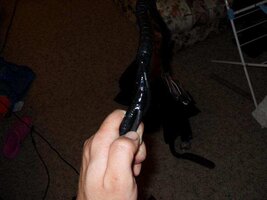
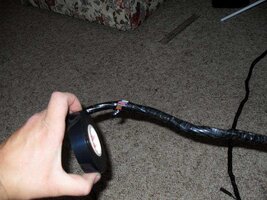
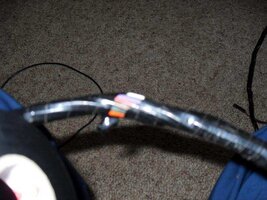
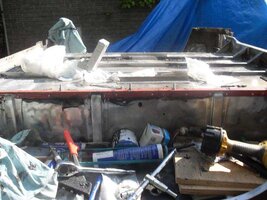
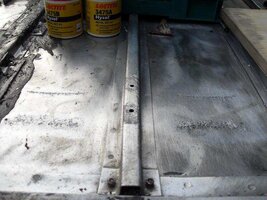
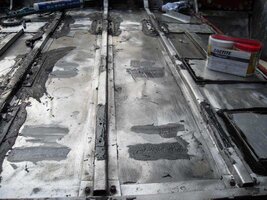
i did a complete rewire in the winter only to fine the mid section crossmember had rotted out.

so began the hard work.

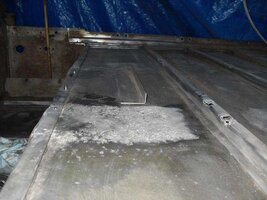
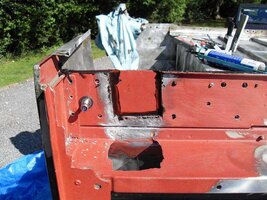
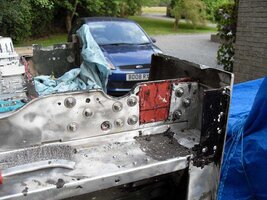
i won't bore you all with telling you i grinded loads of nuts off to get the back off. i did't realise how simple the back end is held on.

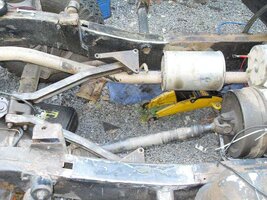
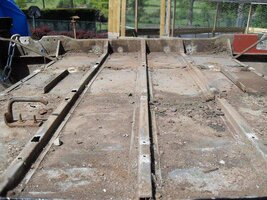
we began by removing the section and double checking the rest of the chassis. luckily the chassis had be protected from the inside but it looks like it may have been a long while ago and the outer hadn't been done to well.

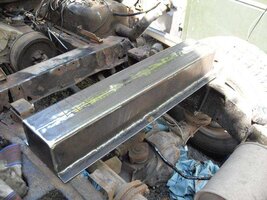
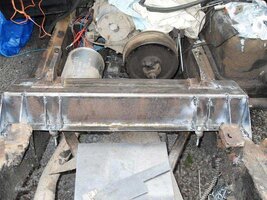
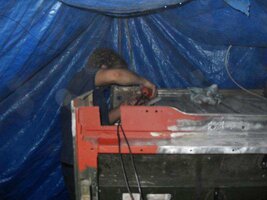
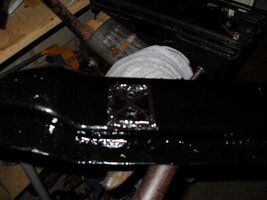
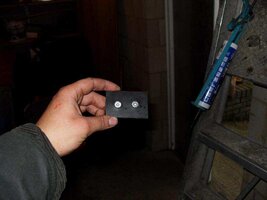
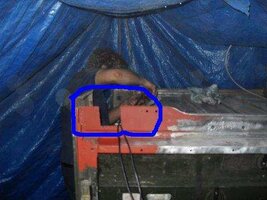
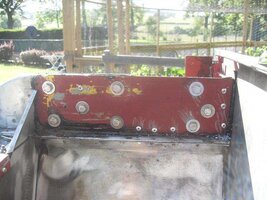
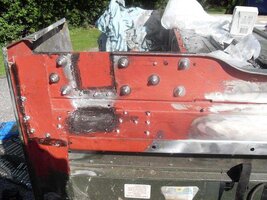
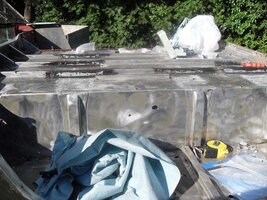
we basicly made the main section and then added the seatbelt support brackets and the triangle support sections as we went along.

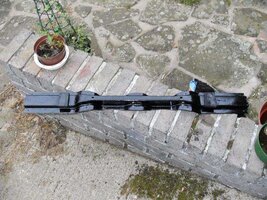
anyway take a look at the photos the photos of the finnished article aren't great but when the rain stops i'll take some more.
 

Attachments

  • Photo001.jpg
    Photo001.jpg
    60.7 KB · Views: 355
  • photo2.jpg
    photo2.jpg
    61.5 KB · Views: 320
  • photo3.jpg
    photo3.jpg
    83.1 KB · Views: 335
  • photo4.jpg
    photo4.jpg
    78.4 KB · Views: 309
  • photo5.jpg
    photo5.jpg
    60.3 KB · Views: 299
the rear tub has also got the standard ali rot underneath
i've made some repairs heres some photos of the rot i'll get some photos of the repairs and explain over the weekend if it stops raining.
cheers lister.

ps in the last photo it started to rain hence the blue tarp...... oh the joys of eorking outside.

i forgot to mention in the previous post that i pulled the loom out the chassis first.
 

Attachments

  • photo6.jpg
    photo6.jpg
    82.3 KB · Views: 256
  • photo7.jpg
    photo7.jpg
    47.5 KB · Views: 229
  • photo8.jpg
    photo8.jpg
    37.1 KB · Views: 229
Looks like some real good progres, that mid section crossmember looks bomb proof, care to make one up for my '85 90 :p :D

Have to say the early 90's seem to be a bit hit or miss with chassis condition. I've known quite a few to be completely shot by now, but examples like yours (and mine) which are still fairly solid is very surprising. I'm hoping to have my stripped down and doing the same this time next year :)

Good look with the rebuild and keep the pictures rolling in :cool:

Jon
 
cheers, the mid section made of 5mm and 3mm plate so it should last a little while.
i intend on covering the ends where it rotted before.
 
As Jon says that new cross member looks great! Just noticed you live in Oxford! I live in Woodcote (about 6 miles southish of Wallingford) so i might see you around:).

Looks like some real good progres, that mid section crossmember looks bomb proof, care to make one up for my '85 90 :p :D

Have to say the early 90's seem to be a bit hit or miss with chassis condition. I've known quite a few to be completely shot by now, but examples like yours (and mine) which are still fairly solid is very surprising. I'm hoping to have my stripped down and doing the same this time next year :)

Good look with the rebuild and keep the pictures rolling in :cool:

Jon


Brian
Well we must have been very lucky with my dads '87(i think) 90 then, The chassis is spot apart from a tiny hole on a bulkhead outrigger that i need to patch.
 
just a small update i have just made some rubber pads up and fixed them to the rear body crossmembers.

i made the pads up from a couple of 6" drain rod pads.

i counter sunk the holes in the pads so the countersunk bolts don't hit on the chassis mounts.

i used easitex elast-o-seal in black to stick them to the crossmembers just to make sure they don't fall off and i put a seal all round the edge to make sure water foesn't get underneath.

i then filled the gap left over behind then bolts with elast-o-seal to stop the bolts bannging on the chassis mounts.

elas-o-seal is similar to silicone sealant but doesn't sontain silicone and is very weather resistant. i also used to bond body panels together. its also very grippy we use it at work to cover broken windows ( you know when you see broken windows covered with boards that are held on with silicone type suff well you can use this stuff and we use it on guttering )
 

Attachments

  • SDC10900.jpg
    SDC10900.jpg
    81.7 KB · Views: 212
  • photo10.jpg
    photo10.jpg
    31.9 KB · Views: 225
  • photo9.jpg
    photo9.jpg
    28.5 KB · Views: 245
just some random pics of us doing some work on the landy.
 

Attachments

  • landy1.JPG
    landy1.JPG
    40.5 KB · Views: 273
  • landy3.JPG
    landy3.JPG
    31.9 KB · Views: 257
  • landy4.JPG
    landy4.JPG
    33.6 KB · Views: 252
  • landy2.JPG
    landy2.JPG
    33.1 KB · Views: 254
that looks like some good work there. I need to do my cross member as well (noticed it at Christmas but have been apart from my 110 ever since).
 
now for the serious stuff.

in the pic you can see i need to put in a plate to cover the hole.
what size bolts shall i use M10 or will M8 be ok?

i will use large penny washers aswell.

i was thinking if i put 4 x M8 bolts in either side.

what ya think?
 

Attachments

  • landy5.JPG
    landy5.JPG
    20.6 KB · Views: 214
after removing the rear chassis harnes to repair the chassis there was quit a bit of dammage to the outer loom tape so i re wrapped the loom with pvc loom tape and then wrapped it in spiral wrap.

my thinking was the spiral wrap would help stop the loom wearing through
on the chassis.

here is some photos of the loom.
 

Attachments

  • photo14.jpg
    photo14.jpg
    57.5 KB · Views: 177
  • photo13.jpg
    photo13.jpg
    54.7 KB · Views: 188
  • photo15.jpg
    photo15.jpg
    30.5 KB · Views: 193
  • photo12.jpg
    photo12.jpg
    64 KB · Views: 157
  • photo11.jpg
    photo11.jpg
    54 KB · Views: 167
just some pics of the usual reapairs on the landy rear tub.
i think i may have gone over the top with the fixings but hey.... i don't want the repair plates to fall off.
on the flat of the rear tub i used some ali angle to strengthen the corners and some ali box and angle to repair the ribs that run along the tub floor.
i also gave the top of the ali box with a good layer of elast-o-seal to stop the ali coming into contact with the steel crossmembers.
anyhow the pics will explain better than i ever could......enjoy.:eek:
 

Attachments

  • photo16.jpg
    photo16.jpg
    68.6 KB · Views: 215
  • photo17.jpg
    photo17.jpg
    56 KB · Views: 193
  • photo18.jpg
    photo18.jpg
    67.8 KB · Views: 204
  • photo21.jpg
    photo21.jpg
    53.3 KB · Views: 210
just a before and now photo comparisson.
although from different angles
 

Attachments

  • photo20.jpg
    photo20.jpg
    69.6 KB · Views: 196
  • photo6.jpg
    photo6.jpg
    82.3 KB · Views: 156
Nice work young chap! :)

When I had 'issues' with the rear floor of my 1985 Ninety, I chopped out the complete floor and replaced it with a sheet of 3mm chequer plate. For the longditudinal reinforcing bars, I also binned the original muck trapping top-hat sections and replaced them with some of B & Qs' finest 16mm U section aluminium channel which was bonded and rivetted in place.

9 years later it is still holding up :)
 
well i need to replace the rear body rail (see pic 1. it's the rail that bolts to the rear crossmember and across the rear of the body.) and seeing as my local deal wants £84 plus vat and theres no replacement part i've decided to make one from stainless steel.
my friends got a sheet bender but not sure it's long enough so may need to make it out of two pieces and weld together.
i'm going to put some plates on the end to give the rear quarters a bit more strength.
heres my first drawing (see pic 2)
i'll get some pics when its made.:D
 

Attachments

  • part.jpg
    part.jpg
    971 bytes · Views: 116
Last edited by a moderator:
just some more pics of the repair on the rear tub.
as before really more ali plate and sealant.
i also filled the pitted areas in with ali based liquid metal.
can you see where i was drilling the hole for the fuel yank breather pipe and my battery ran out?
hopefully i'll get some more exciting pics soon.......:eek:
 

Attachments

  • photo22a.jpg
    photo22a.jpg
    70.9 KB · Views: 153
  • photo23.jpg
    photo23.jpg
    65.2 KB · Views: 153
  • photo24.jpg
    photo24.jpg
    54.5 KB · Views: 178
  • photo25.jpg
    photo25.jpg
    66.7 KB · Views: 178
Back
Top Bottom