There are a few threads on this subject on the forum, but thought I would add my version based on recently completing this job. Feel free to comment where you think I could have improved or done differently.
You will need
Socket set / spanners
Drill / bits
30mm x M8 bolts / nuts
Inertia reel seat belt kit from Padocks or similar (about £25 ea) You need LH and RH versions
Upper seat belt bracket (£5 for pattern part). LH and RH required
30mm x 4mm steel bar
Step 1
Remove all the existing static belts if fitted. They will doubtless be frayed and useless as mine were. Also remove the buckle stalks from behind the seat backs. This will be extremely stiff judging by mine, and will require a breaker bar to undo. It will be easiest with all the seats removed, but can be done by removing the seat bases, tilting the backs forward, and using an extension bar on the socket, to reach down and undo. Plenty of WD40 before and during. If you want to tidy things up you can also undo the bottom belt bracket at floor level by the seat box, and take it off for a rub-down and respray.
Step 2
Fitting the upper seat belt brackets.
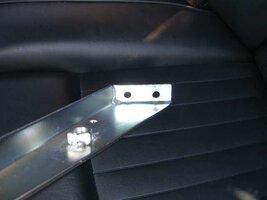
These are designed for hard-tops so will not fit straight in, as the truckcab roof curves round. Before you start they will look like this:
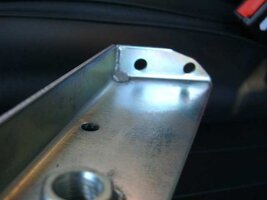
When you finish trimming they will look like this:
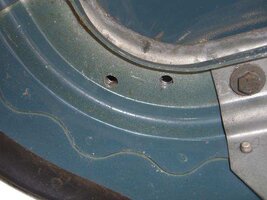
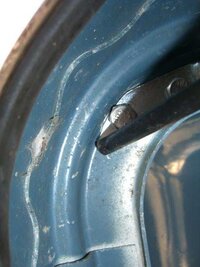
Ensure you only take the minimum of material off. You are aiming for a snug fit inside the roof edge like this:
Once happy with position, you can start to fix in place. I found this easiest by clamping in place, and caefully measuring the position for the single M8 fixing at the bottom of the bracket. Once this is drilled and bolted in place you can mark the roof channel for drilling the upper bracket holes. It helps to stick masking tape in the channel to make your marks clearer, then simply run a pencil around the holes.
Take off bracket and drill making sure you have a block of wood or rolled up rag to catch the drill bit as it comes through, to avoid damaging roof. Rolled up rag will catch on drill, so be careful, but I find this easiest as it can be stuffed into the narrow gap.
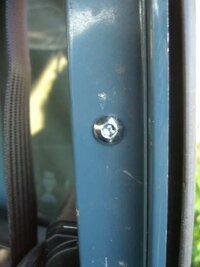
Button headed bolt is neatest way of securing bottom bracket in place as it is visible in door pillar.
Bracket in place looks like this:
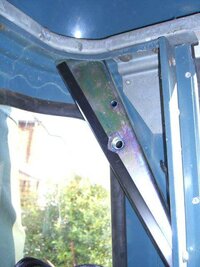
Incidentally black strip on bottom of bracket is not standard. When I finished the job I noticed that one edge of the belt will rub along the bottom of the bracket. Bracket is not sharp, and this would probably never be an issue, but I had the bright idea of adding one of those simple plastic strips that you use to bind paper together. Nice tight grip, and they have a good rounded curve to them, £2.99 for 10 at Rymans.
Step 3
This is the only bit of fabrication in the job. Apparently you can use a hard-top bracket but I could not find them for sale anywhere. Assuming you can't either you need to make an L-shaped bracket to bolt the inertia reel body to.
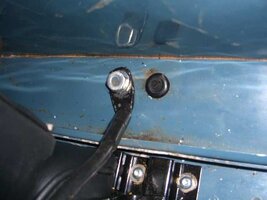
Locate the threaded stud that fixes the truckcab roof to the body tub. It is adjacent to the seat back top. Determine exactly where inertia reel will sit next to the seat back, above this stud, without coming into contact with the seat back itself.
The position of the inertia reel fixing bolt, will be the position of the top hole in the L-Shaped bracket. The bottom of the bracket will be drilled to fix to the threaded stud. Bend a pattern in card to check heights and dimensions.
Once happy, cut bar to length, drill holes in bar, and then bend in vice. What you are trying to make is this:
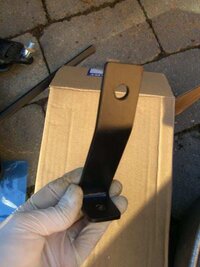

Notice that the bracket cannot be a simple 'L' as if you make it without the forward 'lean' it will sit flat against the outer face of the roof. This will mean that to get access for a bolt you would need to drill through the roof outer panel to secure. No reason why you couldn't do this, and I have seen it done that way. May also be stronger, but up to you.
Step 4
Bracket secures to threaded stud like this:
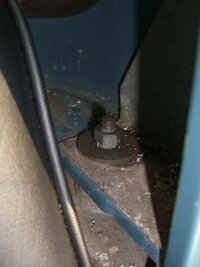
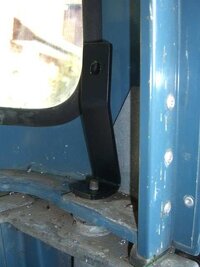
However access is much easier if you mount the inertia reel to the bracket first, then bolt in place as one unit like this:
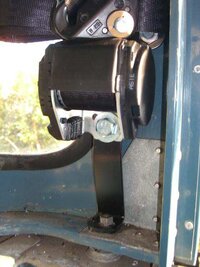
The only thing I would change if doing again, is that the standard threaded stud is not that meaty in comaparison to the other belt fixings so you may wish to replace with new one, made from threaded stud and repair washers.
Next bolt the 'middle' belt loop to the upper bracket. All bolts are supplied (or were in mine), along with some neat bolt head covers.
Then the bottom fixing is bolted to the bracket next to seat box. Note deliberate mistake of missing washer that I've only just noticed in this photograph.
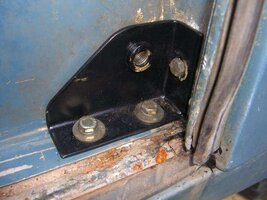
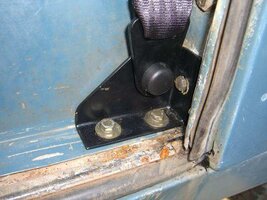
Finally the new belt stalks are bolted in behind the seat backs like this:
Stalks have just enough length to sit neatly between seat bracket uprights.
Done !
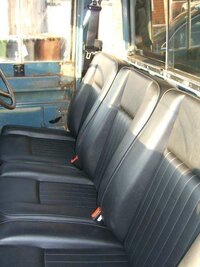
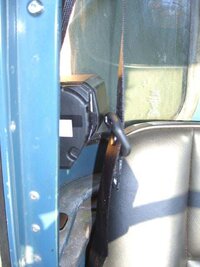
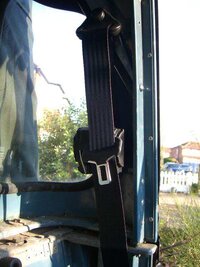
And that's it.
Hope this helps.
You will need
Socket set / spanners
Drill / bits
30mm x M8 bolts / nuts
Inertia reel seat belt kit from Padocks or similar (about £25 ea) You need LH and RH versions
Upper seat belt bracket (£5 for pattern part). LH and RH required
30mm x 4mm steel bar
Step 1
Remove all the existing static belts if fitted. They will doubtless be frayed and useless as mine were. Also remove the buckle stalks from behind the seat backs. This will be extremely stiff judging by mine, and will require a breaker bar to undo. It will be easiest with all the seats removed, but can be done by removing the seat bases, tilting the backs forward, and using an extension bar on the socket, to reach down and undo. Plenty of WD40 before and during. If you want to tidy things up you can also undo the bottom belt bracket at floor level by the seat box, and take it off for a rub-down and respray.
Step 2
Fitting the upper seat belt brackets.
These are designed for hard-tops so will not fit straight in, as the truckcab roof curves round. Before you start they will look like this:

When you finish trimming they will look like this:

Ensure you only take the minimum of material off. You are aiming for a snug fit inside the roof edge like this:


Once happy with position, you can start to fix in place. I found this easiest by clamping in place, and caefully measuring the position for the single M8 fixing at the bottom of the bracket. Once this is drilled and bolted in place you can mark the roof channel for drilling the upper bracket holes. It helps to stick masking tape in the channel to make your marks clearer, then simply run a pencil around the holes.
Take off bracket and drill making sure you have a block of wood or rolled up rag to catch the drill bit as it comes through, to avoid damaging roof. Rolled up rag will catch on drill, so be careful, but I find this easiest as it can be stuffed into the narrow gap.

Button headed bolt is neatest way of securing bottom bracket in place as it is visible in door pillar.
Bracket in place looks like this:

Incidentally black strip on bottom of bracket is not standard. When I finished the job I noticed that one edge of the belt will rub along the bottom of the bracket. Bracket is not sharp, and this would probably never be an issue, but I had the bright idea of adding one of those simple plastic strips that you use to bind paper together. Nice tight grip, and they have a good rounded curve to them, £2.99 for 10 at Rymans.
Step 3
This is the only bit of fabrication in the job. Apparently you can use a hard-top bracket but I could not find them for sale anywhere. Assuming you can't either you need to make an L-shaped bracket to bolt the inertia reel body to.
Locate the threaded stud that fixes the truckcab roof to the body tub. It is adjacent to the seat back top. Determine exactly where inertia reel will sit next to the seat back, above this stud, without coming into contact with the seat back itself.
The position of the inertia reel fixing bolt, will be the position of the top hole in the L-Shaped bracket. The bottom of the bracket will be drilled to fix to the threaded stud. Bend a pattern in card to check heights and dimensions.
Once happy, cut bar to length, drill holes in bar, and then bend in vice. What you are trying to make is this:


Notice that the bracket cannot be a simple 'L' as if you make it without the forward 'lean' it will sit flat against the outer face of the roof. This will mean that to get access for a bolt you would need to drill through the roof outer panel to secure. No reason why you couldn't do this, and I have seen it done that way. May also be stronger, but up to you.
Step 4
Bracket secures to threaded stud like this:


However access is much easier if you mount the inertia reel to the bracket first, then bolt in place as one unit like this:

The only thing I would change if doing again, is that the standard threaded stud is not that meaty in comaparison to the other belt fixings so you may wish to replace with new one, made from threaded stud and repair washers.
Next bolt the 'middle' belt loop to the upper bracket. All bolts are supplied (or were in mine), along with some neat bolt head covers.
Then the bottom fixing is bolted to the bracket next to seat box. Note deliberate mistake of missing washer that I've only just noticed in this photograph.


Finally the new belt stalks are bolted in behind the seat backs like this:

Stalks have just enough length to sit neatly between seat bracket uprights.
Done !


And that's it.
Hope this helps.
