It has been a long time since I posted a blog on here.
I apologise, but fear not, I'm still here...
I've been hibernating, almost, been very busy at work, plus all the usual Christmas / New Year malarky, so I haven't really had the time or funds to do anything to the Land Rover.
Apart from needing a new battery, it behaved impeccably throughout the snowy weather, and I enjoyed myself chugging around when no-one else could get off our road.
Anyway, today, we had sunshine, the snowdrops are flowering, and all's well with the world, so I decided to do a little work on the Land Rover.
The one thing I've been unhappy about this winter has been the quality of the headlights. I reckon a couple of exhausted glowworms could do a better job. The lights were yellow and dim, and even though I kept them clean, and made sure they were correctly adjusted, they didn't really light the road much.
So I decided to replace the standard wiring with my own, incorporating a direct feed from the battery to a set of relays, and uprated wiring. Initially I was going to provide a relay for each individual light, but time, space and funds dictated that I settled on using three relays, one each for dipped beam, high beam, and spotlights.
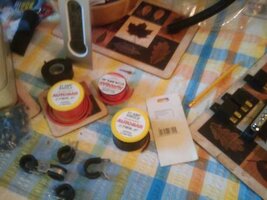
I gathered together a collection of bits:
Using the case from a knackered PC power-supply, I cut a flat plate to mount the relays on, and also an earth strip, which would also be fed direct from the battery.
Marking it out:
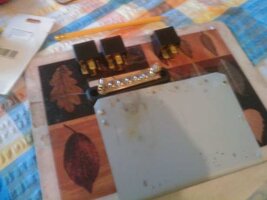
Holes drilled:
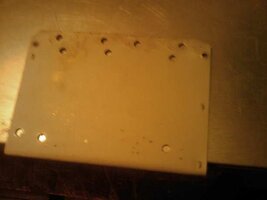
I fitted the relays and earth strip to the plate:
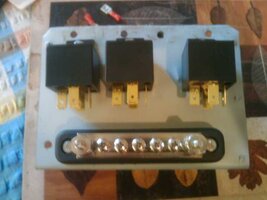
...and then connected the relay earths to the earth strip:
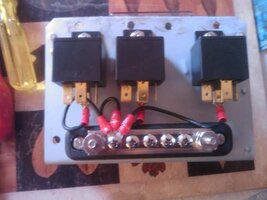
With all that completed, I went outside to the victi... I mean, the Land Rover, and started preparing it.
I took off the passenger seat squab, the battery compartment lid, and the polystyrene sheet that I put in there to keep the battery warm during the spell of -20C tempereatures we had last year.
I have bought a reel of corrugated split conduit to run my new wiring from the battery box to the engine compartment, so I started measuring and deciding where it would run, to keep it away from the exhaust, propshaft and other nasties.
Eventually, I decided to drill a new hole in the front of the battery box, just next to an existing cable entry:
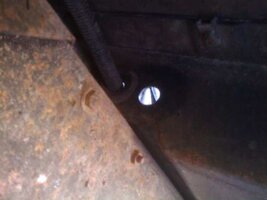
And the conduit just fitted nicely:
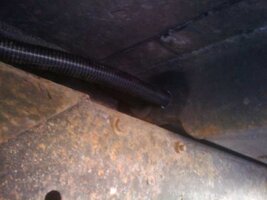
It might have been sunny, but the ground was still wet, and I'd thoughtfully parked so that I could lie in a puddle whilst I grovelled about under the landy drilling the hole and running the conduit. It was during this operation that I offered up the obligatory blood sacrifice to the Land Rover gods, when I found the corner of the open passenger door with my head.
I fed new 4mm (rated at 30A) cables through the conduit from the battery box to the N/S front wing where the relay panel was going to be fitted, one red positive feed for each relay, and one black earth to the earth strip.
I fitted a four-way fuse box to the side of the battery box, and terminated the cables to it:

Then I started wiring up the relay panel. I used crimped connectors, but I soldered them as well, so they should be pretty robust.
I dismantled all the front of the Landy, taking off the sidelights, indicators, front trim panels, and the headlight bowls until I was left with a very blank looking front end:
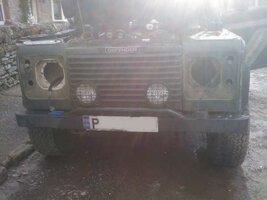
Sorry about the photo - but it proves there was sun! What would we do without the front wings to hold all the tools and stuff?
I ran new cable to the two headlights, and the front spotlights. I didn't (I'm afraid) use wires the same colour code as the existing headlights due to funding issues, instead I used Blue for high beam, Brown for dipped beam, and Black for the earths. for the spots, I used Red and Black.
I used some more conduit for the O/S headlight (the furthest from the relays) routing it down under the radiator and fan, fixed to the front crossmember with rubber sheathed stainless steel P clips.
To switch the relays, I decided to go back to the main light switch and flash / indicator / high beam switch on the steering column, rather than taking the feed from the existing wiring. I regretted this...
I did this because my Ninety (1997 vintage) has dim / dip headlights - where the low-beam headlights come on at reduced power with the sidelights, if the ignition is on. I didn't want to get involved in figuring out how to disable this bit, but still get low-beam to come on as normal, so I took the easy way out and ignored it all together.
So, I had to take the dashboard to bits, and remove the cowlings around the steering column. Me and the instrument panel are old acquaintances, we have battled together on many occasions, but the column shroud was a new enemy. I undid every screw I could see but it didn't want to give up that easily. I had to detach the lower shell from the steering column and twist it around the ignition lock to free it.
Note to self: remove keys from ignition before attempting this...
I undid the instrument panel and wrestled it into submission, moving it up and out of the way so I could put my hands in the writhing mass of wires that it was hiding.
Then I identified the correct wires from the two switches, and cut them and rejoined them with bullet connectors so I could run the new low beam / high beam wires to the low current connections on the relays. I lost a lot of skin from fingers and hands, but eventually it was all connected, and back together again.
I connected all the wiring to the relay panel, and secured it in position:
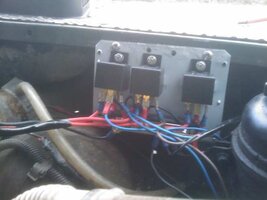
I turned on the ignition, and listened as my new relays clicked happily in all the right places as I turned on the headlights, and then high / low beam, flash and so on.
So then it was just a matter of connecting the headlights, putting the front of the Land Rover back together, and making sure it was all tidy and secure.
They do appear to be brighter, on both high and low beam - the filament seems to be burn whiter than before, plus I've now got my spots wired to come on with the high beam.
I've not taken it on a road test yet, but I'm confident that this will have been worth the blood, sweat and tears...
I apologise, but fear not, I'm still here...
I've been hibernating, almost, been very busy at work, plus all the usual Christmas / New Year malarky, so I haven't really had the time or funds to do anything to the Land Rover.
Apart from needing a new battery, it behaved impeccably throughout the snowy weather, and I enjoyed myself chugging around when no-one else could get off our road.
Anyway, today, we had sunshine, the snowdrops are flowering, and all's well with the world, so I decided to do a little work on the Land Rover.
The one thing I've been unhappy about this winter has been the quality of the headlights. I reckon a couple of exhausted glowworms could do a better job. The lights were yellow and dim, and even though I kept them clean, and made sure they were correctly adjusted, they didn't really light the road much.
So I decided to replace the standard wiring with my own, incorporating a direct feed from the battery to a set of relays, and uprated wiring. Initially I was going to provide a relay for each individual light, but time, space and funds dictated that I settled on using three relays, one each for dipped beam, high beam, and spotlights.
I gathered together a collection of bits:

Using the case from a knackered PC power-supply, I cut a flat plate to mount the relays on, and also an earth strip, which would also be fed direct from the battery.
Marking it out:

Holes drilled:

I fitted the relays and earth strip to the plate:

...and then connected the relay earths to the earth strip:

With all that completed, I went outside to the victi... I mean, the Land Rover, and started preparing it.
I took off the passenger seat squab, the battery compartment lid, and the polystyrene sheet that I put in there to keep the battery warm during the spell of -20C tempereatures we had last year.
I have bought a reel of corrugated split conduit to run my new wiring from the battery box to the engine compartment, so I started measuring and deciding where it would run, to keep it away from the exhaust, propshaft and other nasties.
Eventually, I decided to drill a new hole in the front of the battery box, just next to an existing cable entry:

And the conduit just fitted nicely:

It might have been sunny, but the ground was still wet, and I'd thoughtfully parked so that I could lie in a puddle whilst I grovelled about under the landy drilling the hole and running the conduit. It was during this operation that I offered up the obligatory blood sacrifice to the Land Rover gods, when I found the corner of the open passenger door with my head.
I fed new 4mm (rated at 30A) cables through the conduit from the battery box to the N/S front wing where the relay panel was going to be fitted, one red positive feed for each relay, and one black earth to the earth strip.
I fitted a four-way fuse box to the side of the battery box, and terminated the cables to it:

Then I started wiring up the relay panel. I used crimped connectors, but I soldered them as well, so they should be pretty robust.
I dismantled all the front of the Landy, taking off the sidelights, indicators, front trim panels, and the headlight bowls until I was left with a very blank looking front end:

Sorry about the photo - but it proves there was sun! What would we do without the front wings to hold all the tools and stuff?
I ran new cable to the two headlights, and the front spotlights. I didn't (I'm afraid) use wires the same colour code as the existing headlights due to funding issues, instead I used Blue for high beam, Brown for dipped beam, and Black for the earths. for the spots, I used Red and Black.
I used some more conduit for the O/S headlight (the furthest from the relays) routing it down under the radiator and fan, fixed to the front crossmember with rubber sheathed stainless steel P clips.
To switch the relays, I decided to go back to the main light switch and flash / indicator / high beam switch on the steering column, rather than taking the feed from the existing wiring. I regretted this...
I did this because my Ninety (1997 vintage) has dim / dip headlights - where the low-beam headlights come on at reduced power with the sidelights, if the ignition is on. I didn't want to get involved in figuring out how to disable this bit, but still get low-beam to come on as normal, so I took the easy way out and ignored it all together.
So, I had to take the dashboard to bits, and remove the cowlings around the steering column. Me and the instrument panel are old acquaintances, we have battled together on many occasions, but the column shroud was a new enemy. I undid every screw I could see but it didn't want to give up that easily. I had to detach the lower shell from the steering column and twist it around the ignition lock to free it.
Note to self: remove keys from ignition before attempting this...
I undid the instrument panel and wrestled it into submission, moving it up and out of the way so I could put my hands in the writhing mass of wires that it was hiding.
Then I identified the correct wires from the two switches, and cut them and rejoined them with bullet connectors so I could run the new low beam / high beam wires to the low current connections on the relays. I lost a lot of skin from fingers and hands, but eventually it was all connected, and back together again.
I connected all the wiring to the relay panel, and secured it in position:

I turned on the ignition, and listened as my new relays clicked happily in all the right places as I turned on the headlights, and then high / low beam, flash and so on.
So then it was just a matter of connecting the headlights, putting the front of the Land Rover back together, and making sure it was all tidy and secure.
They do appear to be brighter, on both high and low beam - the filament seems to be burn whiter than before, plus I've now got my spots wired to come on with the high beam.
I've not taken it on a road test yet, but I'm confident that this will have been worth the blood, sweat and tears...
