As previously confessed, I do a bit of railway modelling when not fixing Land Rovers.
On a railway modelling forum I frequent, we were discussing the fact that there are very few 1/76 or 1/72 scale models of civilian Land Rovers around, particularly the short wheelbase Series 2, 2A and 3 hardtop, which were the ubiquitous farmers' vehicle for at least 25 years from 1960 to 1985, and probably later.
Oxford Diecast do a Series 1 SWB, but unless you are modelling the very early 60s, it is unlikely that this would be what you would see out and about.
Someone suggested kit-bashing the Airfix LWB model which comes as a military Series 3 with a trailer, so, as a long time Land Rover owner and enthusiast, I thought I'd have a go.
For the princely sum of £7.99 here's the basis of the conversion.
This kit has been around for at least 50 years, if not more:
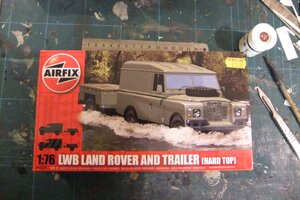
The box artwork, and the painting guide inside look OK, quite authentic,
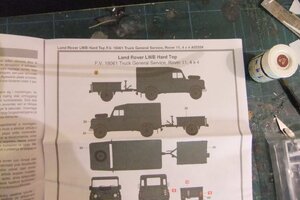
but when you actually look at the parts in the kit, things start to turn sour.
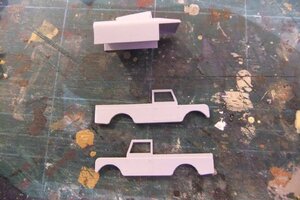
Putting aside the fact that this is a long wheelbase version, the shape of the wheel arches is wrong, the front wing is the wrong shape, and the roof is far too thick.
Compare the wheel arch shape with the real thing, one of my previous Land Rovers :
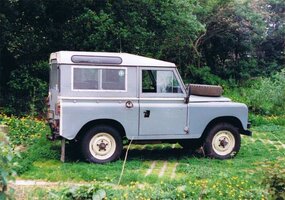
You can see that the top of the wheel aperture in the wing is flattened on the real one, and not a complete curve like the model.
Some filing to be done there then, no big deal considering the butchery we are going to do elsewhere.
The next problem is the front of the wings. Oh dear!
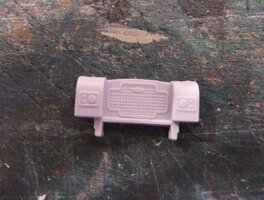
Compare with another of my real Landys:
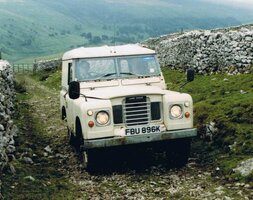
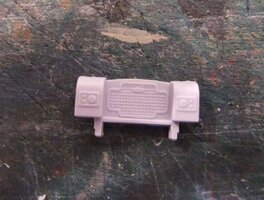
Looks nothing like, wrong shape, the headlights are the wrong size and in the wrong position, and the headlight surround, which should be square, is a thin rectangle.
The Airfix kit seems to use the wing shape of the Series 1: which has a much greater curve on it than the Series 2 / 3, and because of that, they haven't enough room on the flat part to put the proper headlight arrangement.
It's a bit strange, as the artwork shows it correctly, and bears little resemblance to the kit.
Anyway, let's put that to one side for the moment, and look at what we need to do to convert from a Long wheelbase to a Short wheelbase vehicle.
A LWB Land Rover has axle centres at a nominal 109 inches. I say nominal, as the build tolerances on a Land Rover were such that you could easily get a 110 inch Series 3 or a 108 inch.
Added to that, because it uses Leaf springs, the more weight is in the vehicle, the longer the wheelbase would be, as the axles would move apart as the springs flexed.
Anyway, working on 109 inch axle centres, my mathematical genius works that out at 36.3mm in 4mm / foot scale. (or 00)
Surprisingly, that's pretty much what the model has:
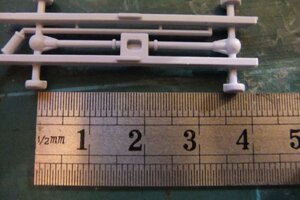
Bodywork-wise, the front half, up to the back edge of the doors, is exactly the same for both LWB and SWB versions, so we only need to consider the back half for butchery.
Using my mathematical prowess once more, I calculate that the axle centres should be 29.3mm apart for a SWB vehicle - that's 88 inches at 4mm / foot, so I need to cut 7mm from the centre of the chassis. I will also have to cut off and shorten the prop shafts, and leave the gearbox in situ...
This is not turning out to be quite so simple...
On the bodywork, it's also not straightforward, as the rear wing will have to be cut in two places - one between the back of the door and the wheel arch, and then again between the back of the wheel arch and the rear of the tub.
Right, so after a couple of cups of tea, and several cigarettes, I had a plan of sorts, so I took a scalpel to the bodywork, as being the slightly less evil of the two jobs: body or chassis.
So I took the first body side, and scribed a line where the trim panel under the doors meets the wing, and then down the back of the door:
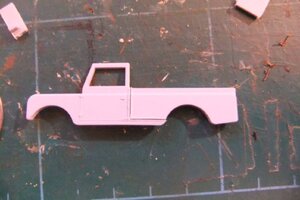
I continued scribing, until eventually I had seperated the rear wing completely:
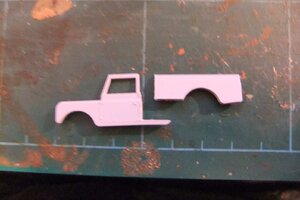
I apologise for that photo, I think I must have sneezed!
Then I measured 7mm, which happily came just where one of the mounting lugs was, and cut off a section of the wing:
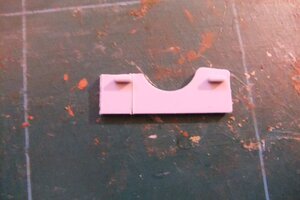
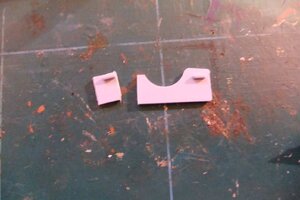
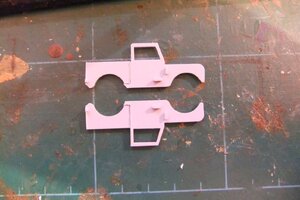
I then did exactly the same on the other body side, and then shortened the overhang at the rear on both wings, and ended up with this:
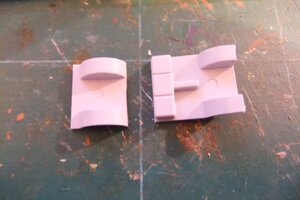
I then cut a 7mm chunk out of the floorpan:
when all placed on the as yet unaltered chassis, this is what we've got so far:
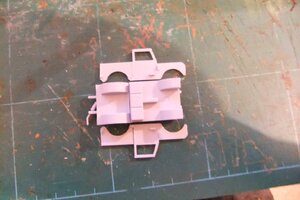
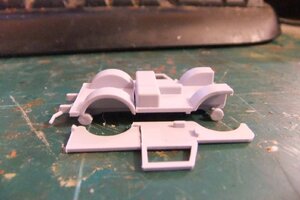
So next, I started with the chassis, such as it is. It bears no resemblance to the real thing, but never mind.
I did half wonder about scratchbuilding an accurate chassis, but then I woke up, and it was all a dream...
So here it is, as yet unharmed..
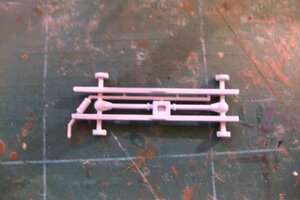
And here it is brutally butchered, with 7mm removed from the back section:
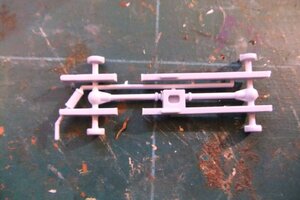
and then a cut and shut:
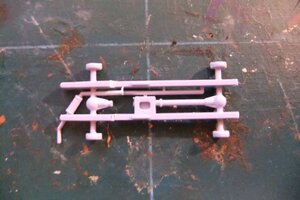
Yeah, I know, the transfer box is in the wrong place, so the rear prop is going to be ridiculously short, but you'll never see it, anyway.
Testing to see if the axle centres lined up with the wheel arch centres - near enough for Land Rover tolerances!
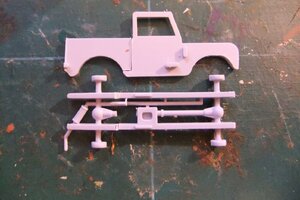
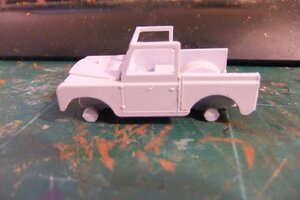
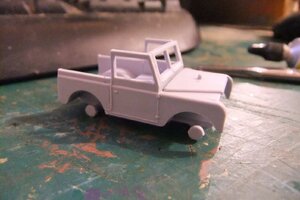
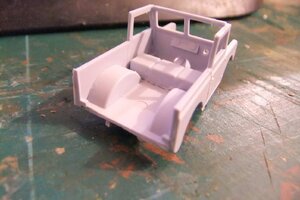
So then I stuck together the chassis sections, the floorpan sections, and the sides, and hey presto, a short wheelbase Land Rover:
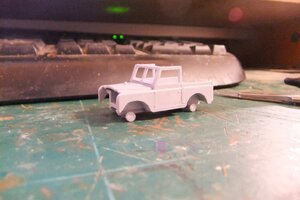
Next, the front wings.
As mentioned above, the kit comes with front wings which resemble no Land Rover ever produced, so I wanted to try and make something a bit closer to reality.
Here's the kit section again as a reminder:
Yeuch!
I decided there was no way to rescue what was there, so I decided to replace the wings with new sections cut out of styrene sheet.
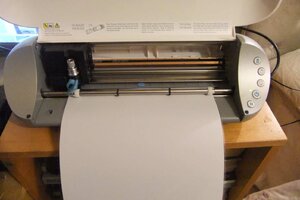
I have a machine called a Silhouette Plotter / Cutter - a fantastically useful device for modelling, which allows me to draw objects on a computer and then cut them out of sheet styrene, much like a printer, but with a knife instead of ink.
Here it is:
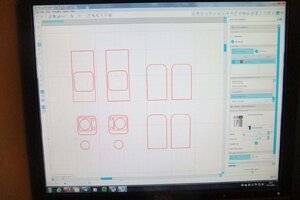
And here's new wing sections being drawn on the computer:
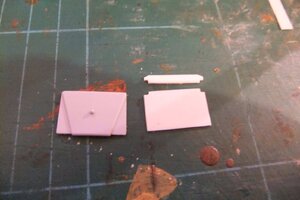
Whilst waiting for the cutter to do its thing, I cut some sections of 20thou styrene, to raise and slightly lengthen the bonnet:
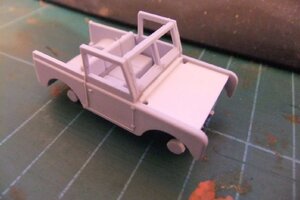
When the cutter had finished, I used some of the sections I'd cut to create small fillets on the inside of the kit's wings, to alter the profile of the front to something more like a Series 3.
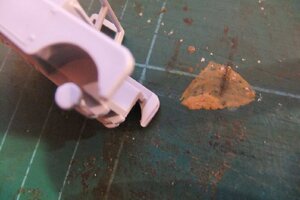
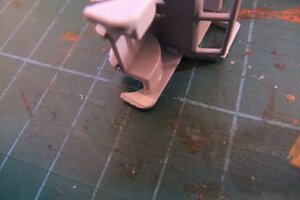
Then using all the parts I'd cut, I assembled my new front wings:
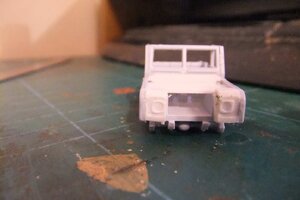
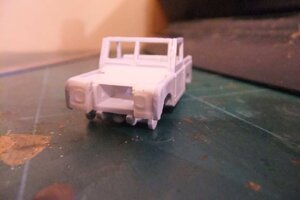
Then, on the original kit section, I cut away the old wings, to leave just the grill section:
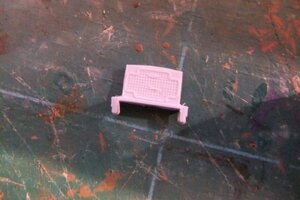
and glued it all in place:
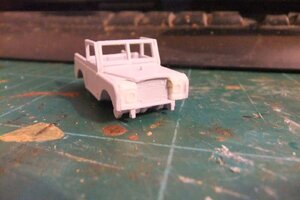
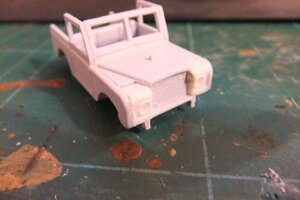
I then temporarily added the wheels, and spare wheel, and also added the galvanised capping strip which is such a feature of the Series 2/3 body, using 10thou x 20thou microstrip, and the bumper, modified to be a civilian version.
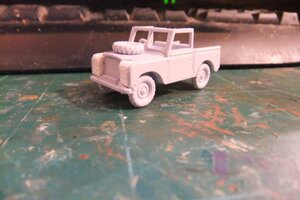
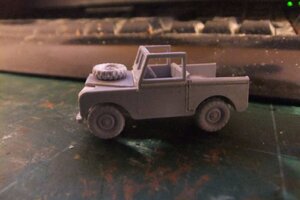
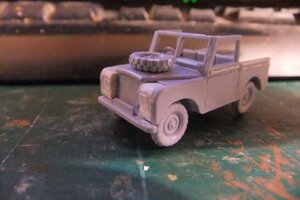
And there we have it; a Series 2 / 3 Short wheelbase Land Rover, from a Long wheelbase kit.
On we go, and it's the turn of the rear body and roof.
I took the original part that came with the kit, which comes as all one solid piece, with no attempt made to model the guttering, and cut off the sides from the roof, and shortened them:
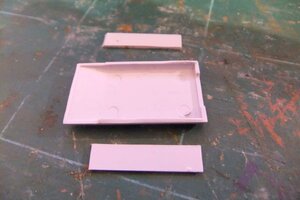
I'd cut the side panels a bit short, so had to bodge things a bit with some 2mm square rod to make everything line up.
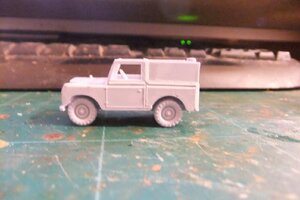
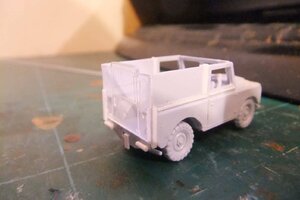
As it happens, this was no bad thing, as it looks more like the prototype.
You can see I've added a few extra bits of detailing as well.
Next up was the roof.
First, I sanded it down by a couple of mil, as it was way too high for a series 3, more like a modern Wolf's roof.
Then I cut a 7mm section out of the middle of the original roof panel:
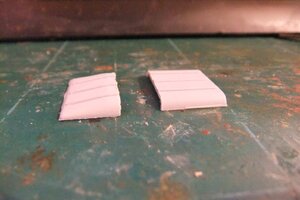
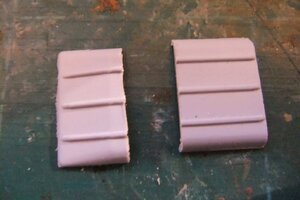
Then, I cut a piece of 10thou styrene sheet, to make the guttering round the roof:
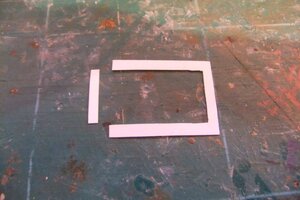
Then I attached the front of the roof:
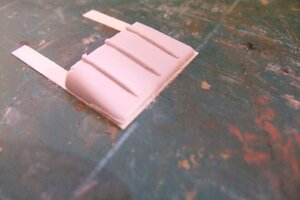
and then the rear:
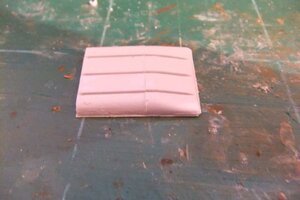
the guttering holds it all together:
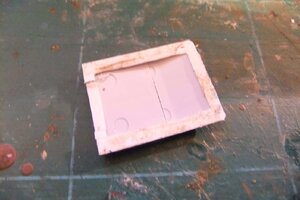
And finally attached the roof to the vehicle:
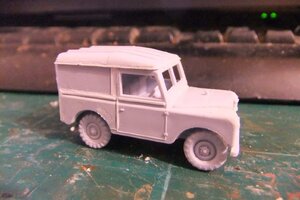
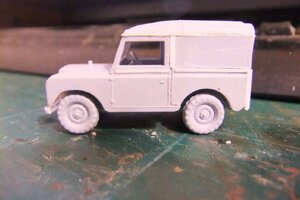
That's the construction about done, the model was next given an all over spray of Matt Olive Green from a Humbrol rattle-can, as an undercoat, and now looks like this:
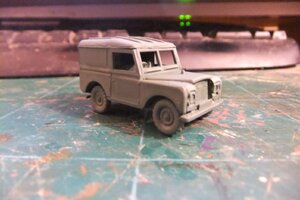
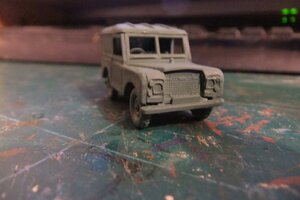
The rear windows are masked off with tape.
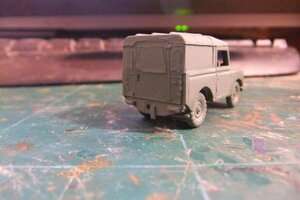
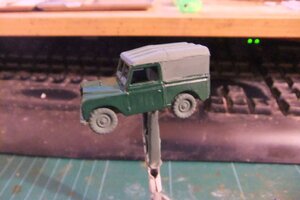
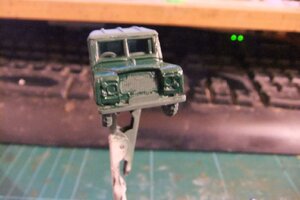
After the Matt Olive undercoat, the first colour was Humbrol Gloss Green No3:
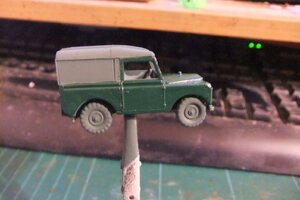
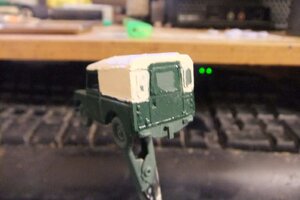
After that, a Limestone colour, made by mixing Humbrol Matt White 34 and Humbrol Rail Colour RC416 Pullman Cream:
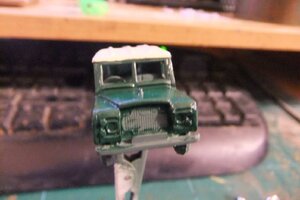
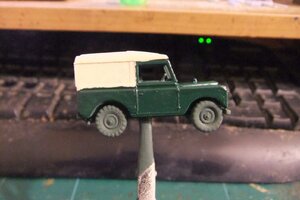
Then Humbrol No56 Aluminium: (very messily done)
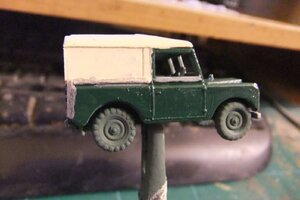
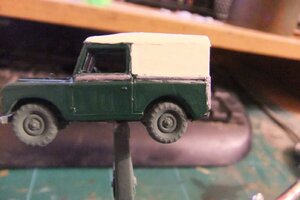
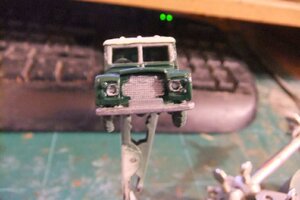
Then the Black, I used Humbrol Rail Colour Dirty Black RC401:
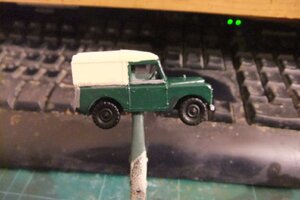
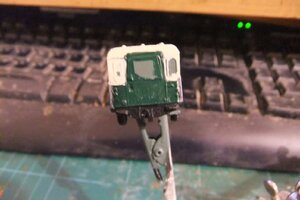
Then I went around with a tiny detail brush, adding the lights etc, and touching up some of the worse bits where I'd over painted.
So here's the finished article, except I forgot to remove the masking tape on the back...
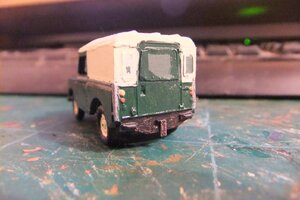
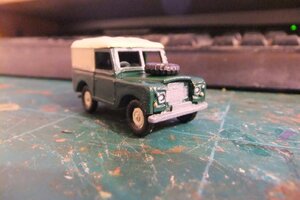
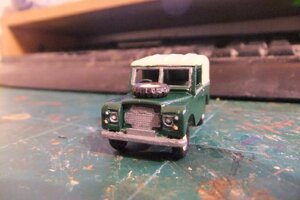
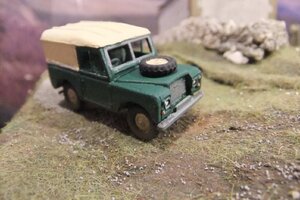
There we are then, a civilian SWB Land Rover Series 3, made from the Airfix military LWB Land Rover Kit.
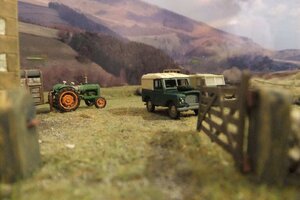
Here's some photos of it in a suitable setting:
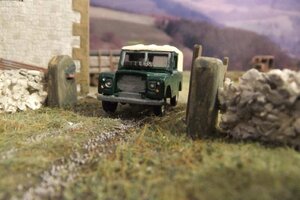
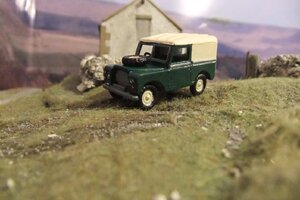
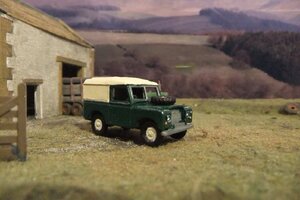
But of course it's not really done yet, it's far to clean and shiny for a real Land Rover.
So a blast of Matt Varnish spray, and some weathering using Humbrol Matt Earth, and it looks a whole lot better:
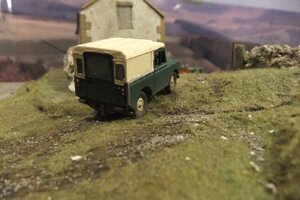
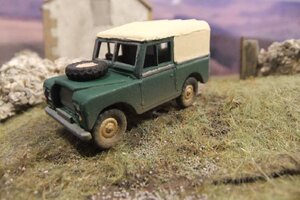
Here, it's with Oxford Diecast's model of a Series 1
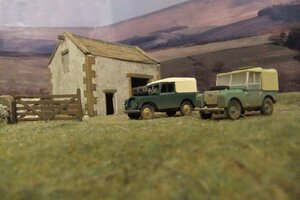
On a railway modelling forum I frequent, we were discussing the fact that there are very few 1/76 or 1/72 scale models of civilian Land Rovers around, particularly the short wheelbase Series 2, 2A and 3 hardtop, which were the ubiquitous farmers' vehicle for at least 25 years from 1960 to 1985, and probably later.
Oxford Diecast do a Series 1 SWB, but unless you are modelling the very early 60s, it is unlikely that this would be what you would see out and about.
Someone suggested kit-bashing the Airfix LWB model which comes as a military Series 3 with a trailer, so, as a long time Land Rover owner and enthusiast, I thought I'd have a go.
For the princely sum of £7.99 here's the basis of the conversion.
This kit has been around for at least 50 years, if not more:

The box artwork, and the painting guide inside look OK, quite authentic,

but when you actually look at the parts in the kit, things start to turn sour.

Putting aside the fact that this is a long wheelbase version, the shape of the wheel arches is wrong, the front wing is the wrong shape, and the roof is far too thick.
Compare the wheel arch shape with the real thing, one of my previous Land Rovers :

You can see that the top of the wheel aperture in the wing is flattened on the real one, and not a complete curve like the model.
Some filing to be done there then, no big deal considering the butchery we are going to do elsewhere.
The next problem is the front of the wings. Oh dear!

Compare with another of my real Landys:

Looks nothing like, wrong shape, the headlights are the wrong size and in the wrong position, and the headlight surround, which should be square, is a thin rectangle.
The Airfix kit seems to use the wing shape of the Series 1: which has a much greater curve on it than the Series 2 / 3, and because of that, they haven't enough room on the flat part to put the proper headlight arrangement.
It's a bit strange, as the artwork shows it correctly, and bears little resemblance to the kit.
Anyway, let's put that to one side for the moment, and look at what we need to do to convert from a Long wheelbase to a Short wheelbase vehicle.
A LWB Land Rover has axle centres at a nominal 109 inches. I say nominal, as the build tolerances on a Land Rover were such that you could easily get a 110 inch Series 3 or a 108 inch.
Added to that, because it uses Leaf springs, the more weight is in the vehicle, the longer the wheelbase would be, as the axles would move apart as the springs flexed.
Anyway, working on 109 inch axle centres, my mathematical genius works that out at 36.3mm in 4mm / foot scale. (or 00)
Surprisingly, that's pretty much what the model has:

Bodywork-wise, the front half, up to the back edge of the doors, is exactly the same for both LWB and SWB versions, so we only need to consider the back half for butchery.
Using my mathematical prowess once more, I calculate that the axle centres should be 29.3mm apart for a SWB vehicle - that's 88 inches at 4mm / foot, so I need to cut 7mm from the centre of the chassis. I will also have to cut off and shorten the prop shafts, and leave the gearbox in situ...
This is not turning out to be quite so simple...
On the bodywork, it's also not straightforward, as the rear wing will have to be cut in two places - one between the back of the door and the wheel arch, and then again between the back of the wheel arch and the rear of the tub.
Right, so after a couple of cups of tea, and several cigarettes, I had a plan of sorts, so I took a scalpel to the bodywork, as being the slightly less evil of the two jobs: body or chassis.
So I took the first body side, and scribed a line where the trim panel under the doors meets the wing, and then down the back of the door:

I continued scribing, until eventually I had seperated the rear wing completely:

I apologise for that photo, I think I must have sneezed!
Then I measured 7mm, which happily came just where one of the mounting lugs was, and cut off a section of the wing:


I then did exactly the same on the other body side, and then shortened the overhang at the rear on both wings, and ended up with this:

I then cut a 7mm chunk out of the floorpan:

when all placed on the as yet unaltered chassis, this is what we've got so far:


So next, I started with the chassis, such as it is. It bears no resemblance to the real thing, but never mind.
I did half wonder about scratchbuilding an accurate chassis, but then I woke up, and it was all a dream...
So here it is, as yet unharmed..

And here it is brutally butchered, with 7mm removed from the back section:

and then a cut and shut:

Yeah, I know, the transfer box is in the wrong place, so the rear prop is going to be ridiculously short, but you'll never see it, anyway.
Testing to see if the axle centres lined up with the wheel arch centres - near enough for Land Rover tolerances!

So then I stuck together the chassis sections, the floorpan sections, and the sides, and hey presto, a short wheelbase Land Rover:


Next, the front wings.
As mentioned above, the kit comes with front wings which resemble no Land Rover ever produced, so I wanted to try and make something a bit closer to reality.
Here's the kit section again as a reminder:

Yeuch!
I decided there was no way to rescue what was there, so I decided to replace the wings with new sections cut out of styrene sheet.
I have a machine called a Silhouette Plotter / Cutter - a fantastically useful device for modelling, which allows me to draw objects on a computer and then cut them out of sheet styrene, much like a printer, but with a knife instead of ink.
Here it is:

And here's new wing sections being drawn on the computer:

Whilst waiting for the cutter to do its thing, I cut some sections of 20thou styrene, to raise and slightly lengthen the bonnet:


When the cutter had finished, I used some of the sections I'd cut to create small fillets on the inside of the kit's wings, to alter the profile of the front to something more like a Series 3.


Then using all the parts I'd cut, I assembled my new front wings:


Then, on the original kit section, I cut away the old wings, to leave just the grill section:

and glued it all in place:


I then temporarily added the wheels, and spare wheel, and also added the galvanised capping strip which is such a feature of the Series 2/3 body, using 10thou x 20thou microstrip, and the bumper, modified to be a civilian version.


And there we have it; a Series 2 / 3 Short wheelbase Land Rover, from a Long wheelbase kit.
On we go, and it's the turn of the rear body and roof.
I took the original part that came with the kit, which comes as all one solid piece, with no attempt made to model the guttering, and cut off the sides from the roof, and shortened them:

I'd cut the side panels a bit short, so had to bodge things a bit with some 2mm square rod to make everything line up.


As it happens, this was no bad thing, as it looks more like the prototype.
You can see I've added a few extra bits of detailing as well.
Next up was the roof.
First, I sanded it down by a couple of mil, as it was way too high for a series 3, more like a modern Wolf's roof.
Then I cut a 7mm section out of the middle of the original roof panel:


Then, I cut a piece of 10thou styrene sheet, to make the guttering round the roof:

Then I attached the front of the roof:

and then the rear:

the guttering holds it all together:

And finally attached the roof to the vehicle:


That's the construction about done, the model was next given an all over spray of Matt Olive Green from a Humbrol rattle-can, as an undercoat, and now looks like this:


The rear windows are masked off with tape.

After the Matt Olive undercoat, the first colour was Humbrol Gloss Green No3:


After that, a Limestone colour, made by mixing Humbrol Matt White 34 and Humbrol Rail Colour RC416 Pullman Cream:


Then Humbrol No56 Aluminium: (very messily done)


Then the Black, I used Humbrol Rail Colour Dirty Black RC401:


Then I went around with a tiny detail brush, adding the lights etc, and touching up some of the worse bits where I'd over painted.
So here's the finished article, except I forgot to remove the masking tape on the back...


There we are then, a civilian SWB Land Rover Series 3, made from the Airfix military LWB Land Rover Kit.
Here's some photos of it in a suitable setting:


But of course it's not really done yet, it's far to clean and shiny for a real Land Rover.
So a blast of Matt Varnish spray, and some weathering using Humbrol Matt Earth, and it looks a whole lot better:


Here, it's with Oxford Diecast's model of a Series 1


