Today, I replaced the serpentine belt on my 300Tdi which drives the fan, alternator, water pump, etc.
As you can see it was ready for a change:
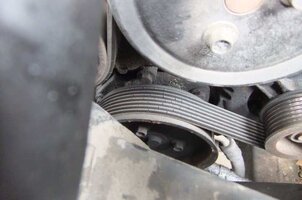
Cracking belt, Grommet!
When ordering a new one, it is important to note there are two types, an early and a later, which are different lengths.
This is because the earlier 300Tdi Discoveries were fitted with a smaller alternator pulley, and therefore the belt is slightly shorter.
The two part numbers are ERR3287 (for the earlier model - to chassis number MA163103 roughly September 1995) and ERR5911 for the later one.
I believe, although I stand to be corrected, that the same is true for the Defender 300Tdi.
My Discovery, first registered in May 1995, uses the earlier one.
OK, so the first job is to remove the fan shroud on top of the radiator cowling.
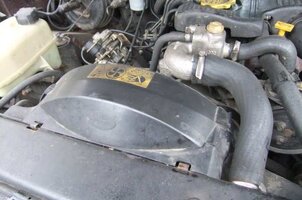
shrouded in mystery
The top section should just unclip from the left hand side as you look at it, and fold up and off.
On my vehicle, the clip had broken, so a thoughtful PO had replaced the clip with a self tapping screw.
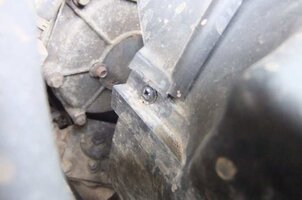
rusty water stains from when the head gasket blew - must clean them off sometime.
Once the top section is removed, you get access to the fan, but not the belt and pulleys.
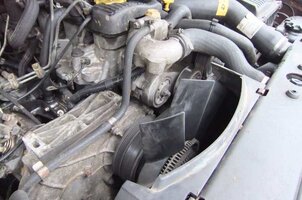
Fan... tastic...
You now really need a special tool - the viscous fan spanner - to undo and remove the fan as there isn't room for a standard width spanner of the correct size (32mm) between the face of the fan pulley and the fan body.
Happily, I just happen to have the correct tool for the job (this is most unusual, for me, but at £3.50 off ebay who wouldn't get one).
Remember, the fan unscrews the WRONG WAY! so to loosen it you need to turn it clockwise.
I also found, with my old belt, that all I did was turn the pulley, so I had to jam a big screwdriver between the boltheads on the face of the pulley and lever against that to undo the fan.
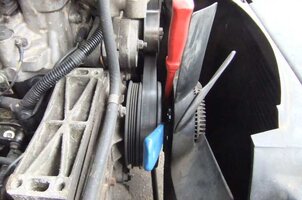
We're jamming...
Once unscrewed, remove the fan:

removing the fan
...which leaves you with this view:
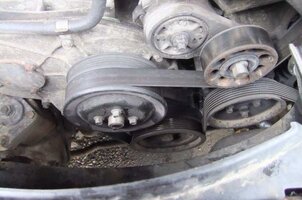
Fan... gone...
I have heard people say that you can now carry out the replacement of the belt, but there really isn't a lot of working room and the remaining part of the fan shroud, or radiator cowling, seriously impedes access to the pulleys and belt, so I removed the top radiator hose, and then the rest of the shroud.
When you've removed the radiator top hose, the rest of the radiator cowling is easy. There are two spring clips which you have to lever up with a screwdriver or similar, and then with a slight struggle the cowling will come out of the vehicle.
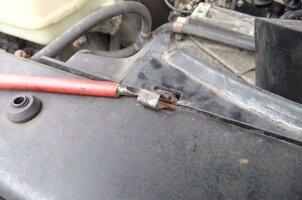
radiator cowling clips removed
Having wrestled the rest of the radiator cowling out of the way, you are left with this access to the belt and pulleys:
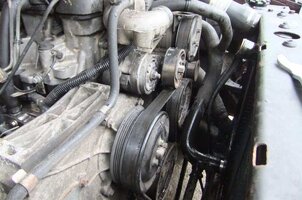
Cowling, fan and top hose removed, water everywhere
I've used the limit of image attachments, so we'll break off there and have a cuppa... to be continued!
As you can see it was ready for a change:

Cracking belt, Grommet!
When ordering a new one, it is important to note there are two types, an early and a later, which are different lengths.
This is because the earlier 300Tdi Discoveries were fitted with a smaller alternator pulley, and therefore the belt is slightly shorter.
The two part numbers are ERR3287 (for the earlier model - to chassis number MA163103 roughly September 1995) and ERR5911 for the later one.
I believe, although I stand to be corrected, that the same is true for the Defender 300Tdi.
My Discovery, first registered in May 1995, uses the earlier one.
OK, so the first job is to remove the fan shroud on top of the radiator cowling.

shrouded in mystery
The top section should just unclip from the left hand side as you look at it, and fold up and off.
On my vehicle, the clip had broken, so a thoughtful PO had replaced the clip with a self tapping screw.

rusty water stains from when the head gasket blew - must clean them off sometime.
Once the top section is removed, you get access to the fan, but not the belt and pulleys.

Fan... tastic...
You now really need a special tool - the viscous fan spanner - to undo and remove the fan as there isn't room for a standard width spanner of the correct size (32mm) between the face of the fan pulley and the fan body.
Happily, I just happen to have the correct tool for the job (this is most unusual, for me, but at £3.50 off ebay who wouldn't get one).
Remember, the fan unscrews the WRONG WAY! so to loosen it you need to turn it clockwise.
I also found, with my old belt, that all I did was turn the pulley, so I had to jam a big screwdriver between the boltheads on the face of the pulley and lever against that to undo the fan.

We're jamming...
Once unscrewed, remove the fan:

removing the fan
...which leaves you with this view:

Fan... gone...
I have heard people say that you can now carry out the replacement of the belt, but there really isn't a lot of working room and the remaining part of the fan shroud, or radiator cowling, seriously impedes access to the pulleys and belt, so I removed the top radiator hose, and then the rest of the shroud.
When you've removed the radiator top hose, the rest of the radiator cowling is easy. There are two spring clips which you have to lever up with a screwdriver or similar, and then with a slight struggle the cowling will come out of the vehicle.

radiator cowling clips removed
Having wrestled the rest of the radiator cowling out of the way, you are left with this access to the belt and pulleys:

Cowling, fan and top hose removed, water everywhere
I've used the limit of image attachments, so we'll break off there and have a cuppa... to be continued!
