• Welcome to the Land Rover UK Forums

    You are currently viewing the site as a guest and some content may not be available to you.

    Registration is quick and easy and will give you full access to the site and allow you to ask questions or make comments and join in on the conversation. If you would like to register then please Register Now

General The workshop adventures of Miffy the 110

Geobloke

Posting Guru
Thought I would chuck the Miffy Chronicles in here. Earlier this week she got a new cubby box armrest:

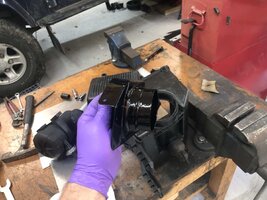
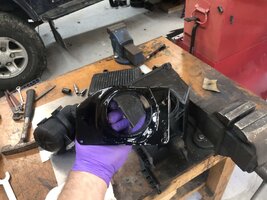
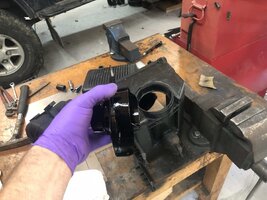
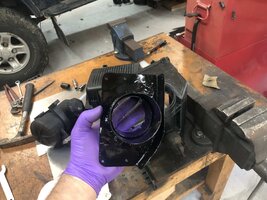
Cubby box Arm Rest Refurb

And this evening I continued with the wiring under he seat box. For way tooooooooo long it has been a bit of a forgotten realm, no longer :)

Or at least the tidy-up began with two new batteries, the previous pair of numb CMX21s lasted over ten years and did sterling work. New batteries, new tidy battery box... but how...

I opted for two Exide EP450 marine deep cycle and stop start batteries that included threaded posts for adding extra ancillaries. To complement these I also opted for a pair of Blue Sea Systems +ve and -ve busbars for the smaller wiring (heated front screen, seats, spots, etc) and a set of battery post busbars for the larger cable connections (winch etc.). The two batteries are connected via a Cyrix-ct 12/24V-120A Intelligent Battery Combiner which includes an emergency jump start facility connecting both batteries together.

I have to say the combination of these busbars works a treat and really keeps the battery box tidy. I am really impressed with the Blue Sea busbars, they look a little flimsy in the photos, but they are not, absolute quality item and I love the protective covers for them too. Super product.

IMG_5661.JPGIMG_5662.JPG
 
Last edited:
Jesus !!! youre not going to run out of lecy there

Well you say that but with a fridge, 240v inverter, etc etc the power comes in handy.

Have to say I knew the old batteries were getting a little long in the tooth but with the Exide the engine has never turned over so quickly...
 
Well, an interesting fault this morning. Never had a (15,2) High Speed Crank (Logged) fault before. Weird...

IMG_5609.JPG

The engine didn't stop just illuminates the MIL engine management light. Stop, start, clear faults and it has not returned. Is it a coincidence that I have just replaced the starter motor?! weird...

Any idea folks?
 
When I changed the clutch on my D2 I had a few Crank Sensor faults, which was down to me catching the wiring on the crank sensor. (Loose connection) once sorted fault cleared and was never an issue again.
 
Well, an interesting fault this morning. Never had a (15,2) High Speed Crank (Logged) fault before. Weird...

View attachment 253797

The engine didn't stop just illuminates the MIL engine management light. Stop, start, clear faults and it has not returned. Is it a coincidence that I have just replaced the starter motor?! weird...

Any idea folks?
Not a coincidence. The shielded pair cable connecting the crank position sensor is susceptible to interference from the starter motor, so it's likely you've interfered somehow with that cable or the CKP itself.
Those cables go brittle with age so I'd recommend you replace it.
 
When I changed the clutch on my D2 I had a few Crank Sensor faults, which was down to me catching the wiring on the crank sensor. (Loose connection) once sorted fault cleared and was never an issue again.
Not a coincidence. The shielded pair cable connecting the crank position sensor is susceptible to interference from the starter motor, so it's likely you've interfered somehow with that cable or the CKP itself.
Those cables go brittle with age so I'd recommend you replace it.

Thanks for the reply Gents... I figured it was unlikely not to be a coincidence, we live in LR world after all. I wonder if I tweaked t during the starter motor swap... Coming to think about it as well as the starter motor replacement it is only eight months or so since haven the bell housing out to refurb the gearbox. I think (and don't laugh now...) I replaced the sensor with a Britpart one when refitting the bell housing... Balls...!

So two suspects: Wiring and/or Britpart sensor.

I expect it is the wiring or multiplug, after nearly 20 years and 220k miles I'd be a bit brittle and temperamental as well... So I have seen replacement loom and sensor kits on eBay which are short crimp/soulder in jobs. Any recommendations? or are they all very similar?
 
I have a PandP cages raised air intake and a Safety Devices roll cage. There are very few raised air intakes that fit with a Safety Devices roll cage and at the time this was the most cost effective RAI on the market.

The RAI is meant to be attached to the roll cage upright using a couple of rubberised P-clips, which is an effective and cheap method of attaching the snorkel. I didn't like this so utilised a Safety Devices roof rack fitting clamp and fabricated a simple supporting strap that links the two mounting points on the RAI to the roll cage clamp. Because fixing the cage to the Rai to the wing shouldn't be a solid fixed mounting I utilised a pair of 300tdi air filter box rubber mounting feet to allow the RAI to flex if required and damp vibrations.

Do not get me wrong it is not a perfect design but the best I could do in an afternoon.

IMG_5692.JPGIMG_5693.JPGIMG_5694.JPGIMG_5695.JPGIMG_5696.JPGIMG_5697.JPG
 
To go with the PandP cages raised air intake I decided to upgrade the inner wing manifold and as I was never really happy with the flexible pipe to air box connection that as well.

This was work done last year, but considering the RAI discussion it might be worth showing those who are interested.


Inner wing manifold.

Made from a combination of tube and plate. I designed this to slot in through the wing rather than be fed from behind the wing. The reason for this is to remove the need for two water-tight seals, instead there is just the one between the RAI and the manifold which are then both held in position but he wing. I thought it was a better solution to the standard wing sandwich method.

From the inner wing the intake is piped using flexible siliconed fabric hose under the steering column and up to the air filter box.

IMG_0719.JPGIMG_0720.JPGIMG_0721.JPGIMG_0722.JPG

Air filter box manifold.

I realise that this is OTT but having previously completed the normal TD5 air box modification I have never been 100% happy with the hose connection. As the truncated filter box hose connection was short and restrictive... So, time to modify... The air box is an irritating shape, hence the strange shape of the mounting bracket, but essentially there is a length of tube the passes through in to the filter box. It may not be pretty but it is completely functional and importantly... sealed...

IMG_0685.JPGIMG_0686.JPGIMG_0687.JPGIMG_0688.JPGIMG_0689.JPGIMG_0698.JPG

IMG_0697.JPGIMG_0699.JPGIMG_0700.JPGIMG_0701.JPG

Snorkel top

Just as an extra, I did swap from a Safari scoop RAI top to a cyclonic style top as the scoop just sucked in too much water. The cyclonic version works brilliantly, the next step would a Donaldson style (clear bowl on top), but as of yet it has not been needed.

IMG_5695.JPG
 

Attachments

  • IMG_0691.JPG
    IMG_0691.JPG
    182.5 KB · Views: 42
  • IMG_0692.JPG
    IMG_0692.JPG
    193.2 KB · Views: 36
  • IMG_0693.JPG
    IMG_0693.JPG
    187.4 KB · Views: 30
  • IMG_0694.JPG
    IMG_0694.JPG
    198.8 KB · Views: 35
  • IMG_0695.JPG
    IMG_0695.JPG
    187 KB · Views: 34
  • IMG_0696.JPG
    IMG_0696.JPG
    176 KB · Views: 32
To go with the PandP cages raised air intake I decided to upgrade the inner wing manifold and as I was never really happy with the flexible pipe to air box connection that as well.

This was work done last year, but considering the RAI discussion it might be worth showing those who are interested.


Inner wing manifold.

Made from a combination of tube and plate. I designed this to slot in through the wing rather than be fed from behind the wing. The reason for this is to remove the need for two water-tight seals, instead there is just the one between the RAI and the manifold which are then both held in position but he wing. I thought it was a better solution to the standard wing sandwich method.

From the inner wing the intake is piped using flexible siliconed fabric hose under the steering column and up to the air filter box.

View attachment 254690View attachment 254691View attachment 254692View attachment 254693

Air filter box manifold.

I realise that this is OTT but having previously completed the normal TD5 air box modification I have never been 100% happy with the hose connection. As the truncated filter box hose connection was short and restrictive... So, time to modify... The air box is an irritating shape, hence the strange shape of the mounting bracket, but essentially there is a length of tube the passes through in to the filter box. It may not be pretty but it is completely functional and importantly... sealed...

View attachment 254674View attachment 254675View attachment 254676View attachment 254677View attachment 254678View attachment 254686

View attachment 254685View attachment 254687View attachment 254688View attachment 254689

Snorkel top

Just as an extra, I did swap from a Safari scoop RAI top to a cyclonic style top as the scoop just sucked in too much water. The cyclonic version works brilliantly, the next step would a Donaldson style (clear bowl on top), but as of yet it has not been needed.

View attachment 254694
Great job! Looks great also!
 
You wouldn't do me a massive favour and grab some dimensions of the TD5 airbox?

I'm currently running a universal cone filter on mine and I'd like to get something more sealed and a "standard" landrover part.

The original 200TDI filter would go in there somewhere but it wouldn't be the best fit so just wondering if that box you have would work better.

Sure I can. As soon as it stops raining I will get them for you. Which could be sometime as the rain just won’t let up 🤣
 
Well, so much to say and so little space to say it.

Start with the refurb of my trusty T-Max air compressor. This thing has done A-LOT of work and the last time I used it the fuse holder got warm enough to melt the housing plastic. So a re-wire, re-grease and added the new Anderson PowerPole connectors and croc-clip extension for other vehicles. Looks superb, just need to test them out tomorrow.

IMG_5863.JPGIMG_5865.JPGIMG_5866.JPG

Next will be the Waeco fridge/freezer and cubby box outlet. The latter of which will double as a battery charging port as well.
 
Next on the list of unexpected jobs... LOF clutch master cylinder... Absolutely love this upgraded master cylinder, super mod. Unfortunately after two years the MC began leaking in to the footwell so gave Luke at LOF a call and next day a replacement arrives FOC. Now that is customer service.

Tomorrows little job is fitting the new MC... Hate this job with all the sound proofing in the footwell ;)
 
Well, so much to say and so little space to say it.

Start with the refurb of my trusty T-Max air compressor. This thing has done A-LOT of work and the last time I used it the fuse holder got warm enough to melt the housing plastic. So a re-wire, re-grease and added the new Anderson PowerPole connectors and croc-clip extension for other vehicles. Looks superb, just need to test them out tomorrow.

View attachment 257559View attachment 257560View attachment 257561

Next will be the Waeco fridge/freezer and cubby box outlet. The latter of which will double as a battery charging port as well.

Well that refurb of the pump was worth the effort... That pump hasn't ever worked as well as it does now and those Anderson PowerPole connectors are superb as an alternative to cigarette plugs or Hella Din plugs. Superb modification...

Then I got a bit carried away and refurb'd the original Miffy starter motor solenoid. Well you will see from the photos why I had some intermittent starting issues, just look at that corrosion and wear on the contacts... Eeeshk I am surprised that it worked as long as it did, mind you after 218k miles it owes me nothing and will make a good backup should the Britpart one die next week ;)

IMG_5867.JPGIMG_5868.JPGIMG_5869.JPGIMG_5870.JPGIMG_5871.JPGIMG_5872.JPGIMG_5873.JPGIMG_5874.JPGIMG_5875.JPGIMG_5876.JPGIMG_5878.JPGIMG_5879.JPGIMG_5880.JPG

The actual job from yesterday was the replacement of the LOF master cylinder. Nice and straight forward replacement and oddly the pedal is lighter than it was with the original LOF MC... weird... Still happy Miffy is back together and changing gear as she should do. Might need a fluid top up or an adjustment in a few days but happy with the job,

Now for Mike.H:

The air filter box is not a cube but slopes backwards towards the bulkhead. This might be useful if fitting partially under a wing or something. The only other things to think about are that the box fits in to a cradle by pushing three prongs in to rubber bushes. Hope these help.

IMG_5881.JPGIMG_5882.JPGIMG_5883.JPGIMG_5884.JPGIMG_5885.JPGIMG_5886.JPG
 
Thanking you kindly Sir! That's a big help to gauge how much space I'd need. I'll have a measure myself later to see if I can fit one in anywhere neatly :)
 
Back
Top Bottom