Well, I haven't posted a blog on here for some while, and since last we spoke I've changed vehicle.
I was the proud owner of a Defender Ninety, and now, having been presented with the opportunity, I've swapped it for a Discovery 1.
Same 300Tdi engine, same R380 gearbox, still a Land Rover, but a bit more comfortable and easier on the ears on the motorway.
As it's a base model Disco, it doesn't have sunroofs, so I haven't got the worry of leaks from that area, but there's still plenty of water getting in other places. My offside headlight was doing double duty as a goldfish bowl, so this weekend as it's sunny I thought I'd fix that, as well as some other little niggles.
Can't see the fish:
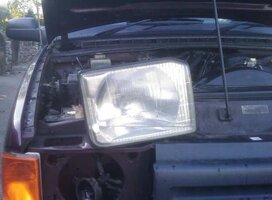
but plenty of water.
Blimey, aren't the headlights easy to take off on these Discoveries! No longer have to undo the sidelight, indicator, trim panel and uncle Tom Cobbley like the Defender, just three plastic turnbuckle thingies and it's out! No doubt this also means that when they break, the headlight will fall out and smash when it's dark and chucking it down with rain on a lonely country road...
I drained the headlight assembly and left it in the sun for an hour to dry. I looked at the possibility of drilling a drain hole, but there is a quarter inch lip at the front of the unit which collects the water, and you'd have to drill through the glass to drain that, so I chickened out and left it.
After an hour I put it back in and moved on to the rear lights. I'd noticed the other day that one of the reversing lights wasn't working, so I thought I'd have a look at the bulb.
You access the rear lights (in the rear pillar) by a little hatch in the interior trim panel. However, to get the panel off, you have to take out the rear side seats (it's a 7 seater). To do that, you need to be a contortionist.
You have to pull the seats out slightly at the top, and then remove the top fixing brackets, which are a Torx screw head, (and were nicely rusty), without allowing the seat to fold back, or drop forward, as then you lose your torx screwdriver down the back, and have to swear and shout and trap your fingers to retrieve it.
These are the fixings:
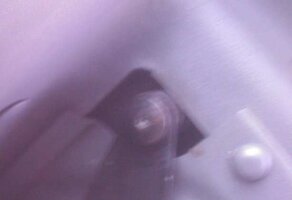
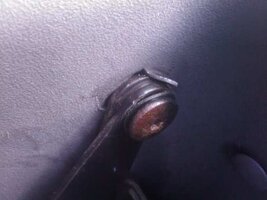
When you finally get the seat mountings off, you end up with this:
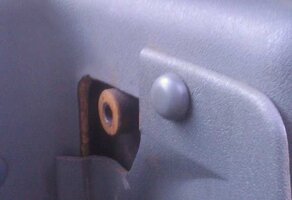
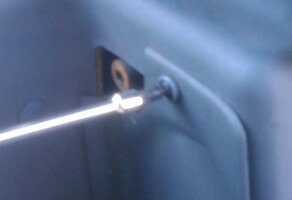
So take off the trim cap and unscrew the panel fixing:
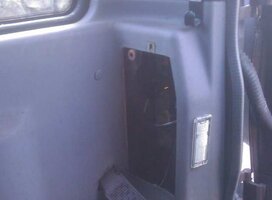
Leaving you with this access to the rear of the lights:
Then you can wrestle the bulb from it's mounting and find it's perfectly all right! just the contacts on the mounting are covered in green fur. A bit of emery cloth later, and all working fine.
Re-assembly is a reverse of the removal process... without the swearing... and about half a can of WD40...
Still on the subject of water, I next partially drained the engine / rad, and put in 5 litres of antifreeze.
There wasn't any there as none was put in when the head gasket and cylinder head were replaced a couple of weeks ago. Working on the theory that the total capacity of the cooling system is about 11 litres, I put in 5 litres of antifreeze and then topped up to the correct level with water, so the mix should be about right.
Rough and ready, I know, but it'll do for a bit.
That's all for now.
I was the proud owner of a Defender Ninety, and now, having been presented with the opportunity, I've swapped it for a Discovery 1.
Same 300Tdi engine, same R380 gearbox, still a Land Rover, but a bit more comfortable and easier on the ears on the motorway.
As it's a base model Disco, it doesn't have sunroofs, so I haven't got the worry of leaks from that area, but there's still plenty of water getting in other places. My offside headlight was doing double duty as a goldfish bowl, so this weekend as it's sunny I thought I'd fix that, as well as some other little niggles.
Can't see the fish:

but plenty of water.
Blimey, aren't the headlights easy to take off on these Discoveries! No longer have to undo the sidelight, indicator, trim panel and uncle Tom Cobbley like the Defender, just three plastic turnbuckle thingies and it's out! No doubt this also means that when they break, the headlight will fall out and smash when it's dark and chucking it down with rain on a lonely country road...
I drained the headlight assembly and left it in the sun for an hour to dry. I looked at the possibility of drilling a drain hole, but there is a quarter inch lip at the front of the unit which collects the water, and you'd have to drill through the glass to drain that, so I chickened out and left it.
After an hour I put it back in and moved on to the rear lights. I'd noticed the other day that one of the reversing lights wasn't working, so I thought I'd have a look at the bulb.
You access the rear lights (in the rear pillar) by a little hatch in the interior trim panel. However, to get the panel off, you have to take out the rear side seats (it's a 7 seater). To do that, you need to be a contortionist.
You have to pull the seats out slightly at the top, and then remove the top fixing brackets, which are a Torx screw head, (and were nicely rusty), without allowing the seat to fold back, or drop forward, as then you lose your torx screwdriver down the back, and have to swear and shout and trap your fingers to retrieve it.
These are the fixings:


When you finally get the seat mountings off, you end up with this:

So take off the trim cap and unscrew the panel fixing:

Leaving you with this access to the rear of the lights:

Then you can wrestle the bulb from it's mounting and find it's perfectly all right! just the contacts on the mounting are covered in green fur. A bit of emery cloth later, and all working fine.
Re-assembly is a reverse of the removal process... without the swearing... and about half a can of WD40...
Still on the subject of water, I next partially drained the engine / rad, and put in 5 litres of antifreeze.
There wasn't any there as none was put in when the head gasket and cylinder head were replaced a couple of weeks ago. Working on the theory that the total capacity of the cooling system is about 11 litres, I put in 5 litres of antifreeze and then topped up to the correct level with water, so the mix should be about right.
Rough and ready, I know, but it'll do for a bit.
That's all for now.
