• Welcome to the Land Rover UK Forums

    You are currently viewing the site as a guest and some content may not be available to you.

    Registration is quick and easy and will give you full access to the site and allow you to ask questions or make comments and join in on the conversation. If you would like to register then please Click Here

JayHoe's '72 2.25 88" rebuild

JayHoe

Extreme Landy Fan
A bit of background

I have loved Landys for more years than I can remember. The first one I went in was an early Range Rover when I was at middle school. The first one I owned was an F reg 110 2.5 diesel. I loved it, and even drove it across Europe twice to Hungary. The problem was I was also using it to commute to work an hour each way, every day. It was when I realised that my fuel bill was more than my mortgage that I decided she had to go :(

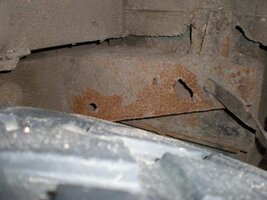
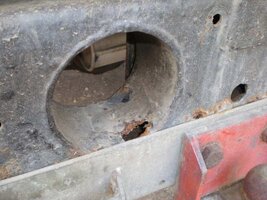
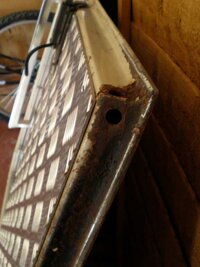
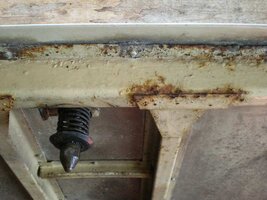
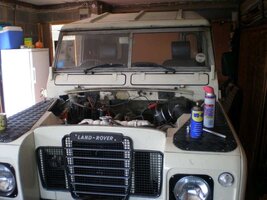
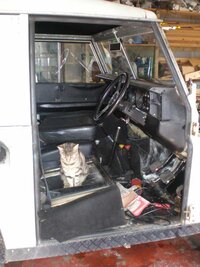
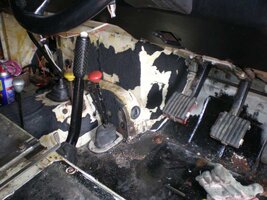
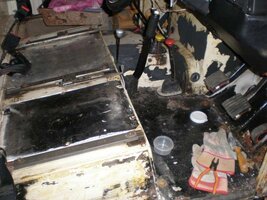
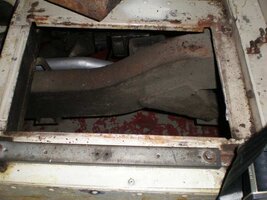
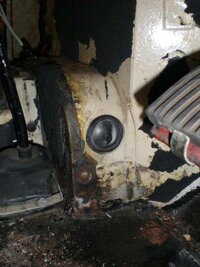
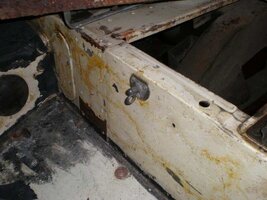
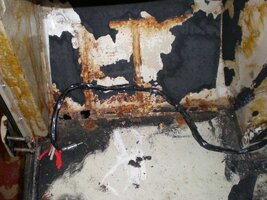
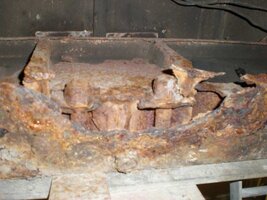
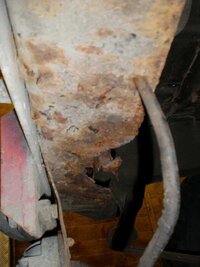
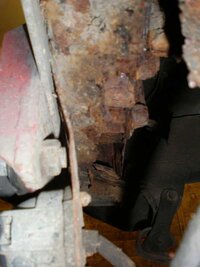
Whiz forward a few years and I now have my SWB 1972 SIII. She is generally very straight, with just a few minor battle scars that I am happy to live with. However, I knew that the chassis was requiring some work in the not too distant. Well, last years MOT was a bit of a shock. The rear cross member is shot (I pocked a hole in it with my finger!) Outriggers suddenly have 1" wide holes - gulp. It failed due to corrosion near mounting points on three corners of the vehicle. The bulk head is crumbling on the top rail, the footwells and I think the pillars as well. So, I reached decision time....

And I decided that I would garage her. I couldn't bear to part with her, I didn't see the point in just patching (and then having problems elsewhere a year or two later) and I was in no position to do a proper job.

A year passes with me gazing at her every time I go in the garage. The number of times I sat in the garage having a smoke and wistfully staring at her doesn't bear thinking of. Then a brainwave...!

I can stop smoking and use the cash to pay for the rebuild!! Every time I have tried to give up I have struggled, but this time, with this (to me) very important goal I have stopped easily.

I have serviced my vehicles for around 20 years to the extent of brakes, master and slave cylinders, UJs, oils etc, so this is going to be a challenge :) I have a reasonable collection of tools and will just have to add to it (or scrounge) when required. I have done no welding or paint spraying.

Aims of this rebuild
I am not looking for a concourse restoration - funds and skills do not allow it and anyway, I want to use her without worrying! I want keep her looking as she currently does, I think the black and sandstone go well together... So the targets are...

1. A new galvanised chassis (with bolt up gearbox cross member) - imperative
2. A replacement bulkhead - this is imperative, and I would like one new. The Morris handmade one is too expensive for me, so I have ordered a TD5 bulkhead from Land rover (Part AHA710460 at £169.32 + VAT) I will worry about the conversion once I have it!
3. Clean, refurbish or replace all components as necessary.
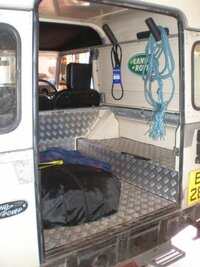
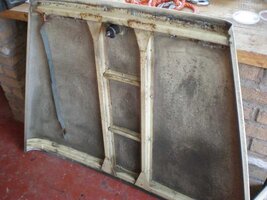
4. Rebuild tub floor as necessary similar to Snaggers rebuild (I have access to sheet ally at cost!! - Phew)
5. Stick in a new clutch and replace relevant seals and gaskets while inspecting the engine (clean and paint the same)
6. Rebuild with a new wiring loom
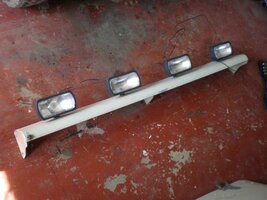
7. Add minor mods - a rear work light, internal courtesy light, a power socket/lighter
8. Possibly fit a Tropical roof
9. Repaint panels while off
10. Investigate and possibly convert to LPG

... And relax :)

A few photos to kick off with...

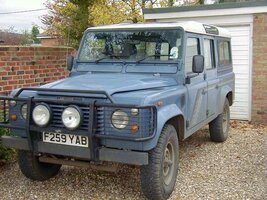
1. My old 110, 'Big Blue' retired to a chicken farm for a few years now
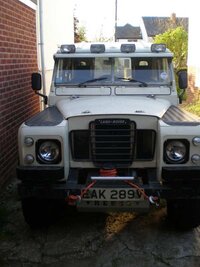
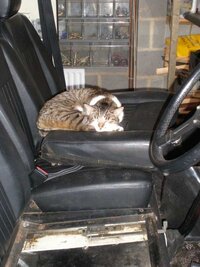
2. Something else I sometimes drive (mmmm, big and bendy)
3. The garage, cleared out and ready (mmmm, heating for cold days :)
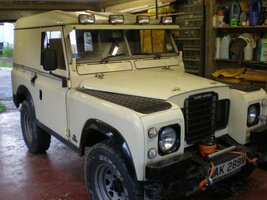
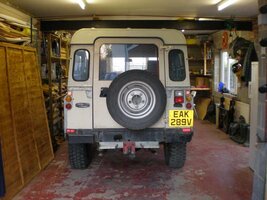
4. The little lady
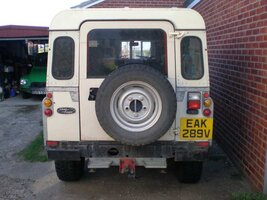
5. The little lady's behind!
 

Attachments

  • Landy.jpg
    Landy.jpg
    71.8 KB · Views: 791
  • 001201.jpg
    001201.jpg
    41.5 KB · Views: 870
  • 52.jpg
    52.jpg
    41.4 KB · Views: 898
  • 53.jpg
    53.jpg
    42.1 KB · Views: 930
  • 54.jpg
    54.jpg
    44 KB · Views: 814
Some more pics...

1. The rear cross member - I poked the hole by the PTO ho0le with my finger - ooh err!
2. Rear outrigger behind fuel tank (the others are the same)
3. In and waiting
4. Another view in the garage
5. Our last time out together before she has major major surgery!!!
 

Attachments

  • 60.jpg
    60.jpg
    49.6 KB · Views: 760
  • 65.jpg
    65.jpg
    46.1 KB · Views: 840
  • 64.jpg
    64.jpg
    46.3 KB · Views: 561
  • 56.jpg
    56.jpg
    36.5 KB · Views: 595
  • 55.jpg
    55.jpg
    45.3 KB · Views: 656
Good luck, cant wait to see this thread get going as im doing almost exactle the same rebuild in the summer;88''series 3, new chassis, new bulkhead and replacement of everything thats past its best.
I think that using the rebuild to stop you smoking is a really good idea, hope it all goes well!

Brian:)
 
Best of fortune with the rebuild,,,,,, Oh and of coarse abstaining from smoking more so. Good to imagine that life might well be extended for both the series and you.:)

Cheers

Dave
 
Best of luck with the rebuild. It will be so worth it.
Any advice I can give? - treat fixings as disposable, wear a cap when using anglegrinder, Use 6 point sockets, and keep bits in take-away containers for each stage- even the scrap stuff you take off. This way you can match the stuff you take off, and put the bags of new bolts in there as you get them.
Sorting out a series 2A 88" at the moment.....lots of bits everywhere....:confused:
 
Thanks for the support guys!

Richie, I have already started collecting take away boxes - I thought it was just me being anal!! lol
 
Hi again John. Glad to see that the project is finally starting. Your aims are very realistic and practical.

A few things from my own experience:

Make sure you use the right tools for each job. Trying to struggle with tools you already have costs a lot of time, can damage the parts being worked on, and can cause you injury. Things like pullers, circlip pliers, torque wrenches and sockets of the correct unusual sizes may not be used every day, but they're cheap enough to be worth the investment. There are a few special tools that cost hundreds of pounds, but if you get friendly with your nearest Series specialist (you'll be spending plenty with them, so you may as well introduce yourself at the start), they'll probably lend you the special tools when you need them for a day or two.

Join a club - most local clubs have not only a significant support network, but also discounts at local suppliers, dealers and insurance companies.

Don't cut corners - it's best to go a little over budget and time now than to have to semi strip the vehicle later for a job that is going to need attention in the future. Your plan to replace the clutch is a good example, but also look at things like the prop shafts, which by servicing or replacing now will be far easier than after the rebuild. Also only use quality parts - cheap parts often don't fit or work properly, so you end up buying another set on top and doing the job twice.

Don't rush. Keep your enthusiasm up by only working on it when you have sufficient time to get stuck in to whatever task it is, and when you feel up to it. Trying to squeeze in jobs into every available minute, especially when tired or fed up, just turns the task into a chore, and the standard will drop.

Make sure that someone else is around when you're doing dangerous tasks, like removing or fitting the suspension or axles - you want someone to call an ambulance if needed!

Good luck with it!:)
 
I spent a little time yesterday and some today on the car. I have removed the doors, bonnet and visor (with spots), and had a brief look over them.

The rear door is generally ok with some corrosion at the bottom, the passenger door is excellent from what can be seen with the door card still in. The drivers door is poorer at the bottom and will need some tidying.

The bonnet has some corrosion on some of the frame (close up pic below). I guess that this is place where I am going to need some advice as to what is sensibly repairable, and what needs to be ditched. So I would appreciate comments especially re the bonnet spars. I am not doing anything with them at the moment, just trying to get in my mind some of the upcoming jobs.

I also thought I would remove the Fairey Winch. Well, the bolts at the front all came out with no bother but the ones at the back.... what ones at the back??!!! Oh, I'll just take it off then... oh its stuck :( It appears that a PO did the old sensible precaution of tack welding the winch on to prevent theft.... and then decided that it therefore only needed its front bolts! I'm glad I never winched in anger with it. Oh well, it will have to stay on for now until I eventually remove the rad and front panel and can grind the tacks off.

I also pulled back some of the carpet and soundproofing which appears more tightly 'welded' on than the winch - lol. I found numerous cables behind that appear to be for a non existant stereo. My next task I think will be to remove all the sound proofing and carpets (kept for patterns) and remove the seats for safe keeping.

1. Rear door removed - the chequer plate all looks in good nick.
2. The removed door, looks OK apart from the bottom and anything dodgy behind the plate (to be discovered at a later date :) )
3. Bottom of the rear door showing corrosion
4. The visor together with spots removed. Shame but the PO drilled 4 holes in the roof above the gutter for the cables. The sealant worked but it would have been a better job to pass them UNDER the gutter through the rubber seal and seal that. Then the roof would have been unholed.
 

Attachments

  • P5110074.JPG
    P5110074.JPG
    48.4 KB · Views: 540
  • P5110076.jpg
    P5110076.jpg
    46.3 KB · Views: 490
  • P5110075.jpg
    P5110075.jpg
    35.2 KB · Views: 447
  • P5110079.jpg
    P5110079.jpg
    37.2 KB · Views: 454
1. Drivers door off, carpets and sound proofing disturbed. The footwell, although holed is actually not too bad as far as can be seen right now but is to be ditched anyway. The cat was not impressed!

2. With bonnet, visor and spots gone, she now looks 'wrong' in some way!

3. The removed bonnet.

4. Corrosion on the spars on the bonnet near the catch (this is probably the worst bit of it. Best way to proceed with it guys???
 
Whoops! Pics gone. Try again (comments as per previous post)....
 

Attachments

  • P5110081.JPG
    P5110081.JPG
    41.9 KB · Views: 512
  • P5110080.jpg
    P5110080.jpg
    42.7 KB · Views: 418
  • P5110078.JPG
    P5110078.JPG
    46.3 KB · Views: 415
  • P5110077.jpg
    P5110077.jpg
    47.9 KB · Views: 523
Hi again John. Glad to see that the project is finally starting. Your aims are very realistic and practical.

A few things from my own experience:

Make sure you use the right tools for each job. Trying to struggle with tools you already have costs a lot of time, can damage the parts being worked on, and can cause you injury. Things like pullers, circlip pliers, torque wrenches and sockets of the correct unusual sizes may not be used every day, but they're cheap enough to be worth the investment. There are a few special tools that cost hundreds of pounds, but if you get friendly with your nearest Series specialist (you'll be spending plenty with them, so you may as well introduce yourself at the start), they'll probably lend you the special tools when you need them for a day or two.

I have a 'reasonable number of tools. I collect tools as I have needed them over the years. Some I do plan on getting, others I can borrow. Good idea about the local supplier. I have dealt briefly with Mark Smiths of Bicester - http://www.marksmith.co.uk/index.html crap site but nice people. I guess I should again make myself known!!


Join a club - most local clubs have not only a significant support network, but also discounts at local suppliers, dealers and insurance companies.

Top idea. I will look into that.

Don't cut corners - it's best to go a little over budget and time now than to have to semi strip the vehicle later for a job that is going to need attention in the future. Your plan to replace the clutch is a good example, but also look at things like the prop shafts, which by servicing or replacing now will be far easier than after the rebuild. Also only use quality parts - cheap parts often don't fit or work properly, so you end up buying another set on top and doing the job twice.

Very much what I plan to do. I am very aware of mission creep and definitely only want to add minor upgrades (apart from maybe the LPG). Yep, props etc will ALL get looked at and serviced.

Don't rush. Keep your enthusiasm up by only working on it when you have sufficient time to get stuck in to whatever task it is, and when you feel up to it. Trying to squeeze in jobs into every available minute, especially when tired or fed up, just turns the task into a chore, and the standard will drop.

Make sure that someone else is around when you're doing dangerous tasks, like removing or fitting the suspension or axles - you want someone to call an ambulance if needed!

I have plenty of time and have no intention of going like crazy and then getting winded, tortoise rather than hare I think! Besides, I want to be careful to make sure nothing gets forgotten or screwed up.

Good safety advice. Now with no doors I would like to point out that the exits are at the rear and one to each side and that safety chutes do not need to be deployed. *G*

Good luck with it!:)

Cheers my man!
 
that lot doesn't look bad at all Joe... Personally I'd wanna remove the chequer plate on the rear door to get a better look at the structure of the frame, if need be, removing the door skin to get into the nuiks and crannies with a wire wheel...

same for the bonnet spars; the pics don't hint at anythin much worse than surface rust...

clean back to bare steel, GOOD coats with something like cold galv or other zinc based primer before top coating. The door frames could be farther protected by waxoyl, although I wouldn't use that on the bonnet braces...

If her drive train is in as good a condition, I reckon you could be in for the most straight forward chassis swap I've heard of... transpose the parts, stick a fork in it n call it DONE....
 
LOL!

Yes, I will be removing the chequer plate to get inside the door, but I am leaving doors until later. I am just stripping odds and sods and enough to start farting around with the new TD5 bulkhead I have coming. Then I can swap it in and out during its conversion process to ensure it all fits.

After that it is time to order the new chassis and then get the baby down to her bones. From then it will be working from axles onto the new chassis - obviously doors are a fair way down the list! However, if i get stuck waiting for something at some point, then there will be nothing to stop me jumping the gun on things like the doors.

How straightforward is removing and the reinstalling a door skin? When it comes to the bonnet, I would have to get the dome rivets of to get inside the spars... is it possible to re do them afterwards?

The drive train seems excellent. The only problem I have is jumping out of third on occasion on the over run. When she failed her MOT :( the mechanic commented on how lively and eager the engine was :D Hopefully that will be just a case of a good clean up and redoing all the seeping seals.

Cheers

John
 
My bulkhead has arrived at the dealer. I will collect it tomorrow. So, having spent the morning gardening in the sun :) I need to do a couple of jobs for the Mrs before she comes home, then carry on stripping. Photos of the bulkhead tomorrow.

John
 
hopefully I'll be able to advise re the door skins later this week; I've a pair of new door bottoms that I wanna strip down and have the frames galvanised before trying to figure out how best to electrically isolate the frame from the skin... Toying with the idea of somethin like plastidip... Overkill maybe, but this'll be the 3rd set of tops n bottoms I've fitted, all of em dying through tin worm or bi-metallic corrosion... It ends now...!!

BTW if ya think that's OTT, wait till I post about the seatbox... :eek::rolleyes:
 
OK, back on the job today. I removed the seats and they are all in excellent condition. None of the vinyl is split, and there is only a couple of touches of surface rust. In fact the rear bench seat looks nearly new with only a couple of minor scratches which may have come from fitting!

I managed to get the carpet and soundproofing out... but it has left a lot of sticky glue and backing sponge. Both footwlls have hole, especially the nearside - I reckon water got in, wet the soundproofing sponge layer and sat there :( I lifted the passenger underseat tool box and could see the top of the chassis - and at that point it is fairly sound. I did the same on the drivers side and the fuel tank looks fab - I think the PO spent quite some money on it (thanks pal!).

I took of the wiper and the rear view mirror and then tried to loosen the roof bolts (I want to get the windscreen out but leave the roof loosely in place for test fitting the new bulkhead). Unfortunately the bolts were all stiff so I have WD40d them and will try tomorrow.

1. Drivers seat showing the very minor corrosion

2. No carpets or soundproofing - just loads of sticky gunk

3. Another view

4. Chassis through the passengers seat base - pretty good nick at this point.
 

Attachments

  • P5120074.JPG
    P5120074.JPG
    36.6 KB · Views: 312
  • P5120075.JPG
    P5120075.JPG
    51.6 KB · Views: 336
  • P5120076.JPG
    P5120076.JPG
    52.9 KB · Views: 368
  • P5120077.JPG
    P5120077.JPG
    43.5 KB · Views: 363
1. Passenger footwell showing corrosion

2. Whats this thingy on the front of the passenger box??

3. Pile of leadlined soundproofing

4. What are these blanking plugs? (1 on each side of the tunnel)
 

Attachments

  • P5120081.jpg
    P5120081.jpg
    44.6 KB · Views: 343
  • P5120080.JPG
    P5120080.JPG
    43.4 KB · Views: 299
  • P5120079.JPG
    P5120079.JPG
    40.4 KB · Views: 357
  • P5120078.JPG
    P5120078.JPG
    52.4 KB · Views: 339
I had a look around at the tow hook and the rear cross member...

1. Looking up at the back of the tow hook mountings...:eek::eek::eek:

2. Looking along xmember - note the gaping holes.... and the lower mounting bolts only being throug the hook plate and not the chassis at all!!!!

3. Same after I grabbed the x member with my hand

4. Look! I have discovered purest landrover!

I better rebuild this quick before it collapses in my garage :D
 

Attachments

  • P5120082.JPG
    P5120082.JPG
    40.9 KB · Views: 380
  • P5120083.jpg
    P5120083.jpg
    32.6 KB · Views: 365
  • P5120084.jpg
    P5120084.jpg
    31.6 KB · Views: 330
  • P5120086.JPG
    P5120086.JPG
    32.8 KB · Views: 332
Back
Top Bottom