-
Welcome to the Land Rover UK Forums
You are currently viewing the site as a guest and some content may not be available to you.
Registration is quick and easy and will give you full access to the site and allow you to ask questions or make comments and join in on the conversation. If you would like to register then please Register Now
You are using an out of date browser. It may not display this or other websites correctly.
You should upgrade or use an alternative browser.
You should upgrade or use an alternative browser.
1985 lr90 restoration
- Thread starter listerd
- Start date

listerd
Overdrive!
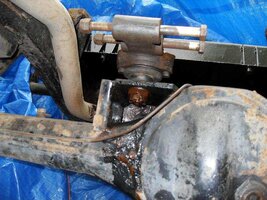
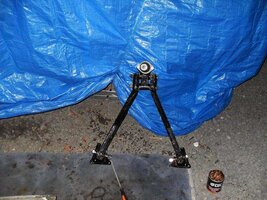
next on the agenda was the a frame bushes and ball joint.
after cutting the wrong size socket down to fit under the ball joint mount
i got the correct size socket and removed the nut after taking the split pin out. ive been soaking the ball joint for a couple of weeks now so there was no suprises. after getting the ball joint housing off i set about the ball joint with a hammer seeing as i don't have a press. after a couple of cans of guiness and a little bit of heat and a sore finger the ball joint came out.
i was very superised it came out seeing as they can weld them selves in.

just realised i now have a wonky little finger.................
after cutting the wrong size socket down to fit under the ball joint mount
i got the correct size socket and removed the nut after taking the split pin out. ive been soaking the ball joint for a couple of weeks now so there was no suprises. after getting the ball joint housing off i set about the ball joint with a hammer seeing as i don't have a press. after a couple of cans of guiness and a little bit of heat and a sore finger the ball joint came out.
i was very superised it came out seeing as they can weld them selves in.
just realised i now have a wonky little finger.................
Attachments

listerd
Overdrive!
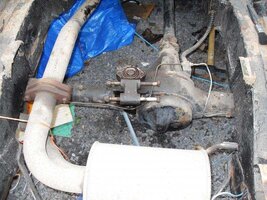
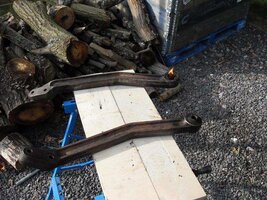
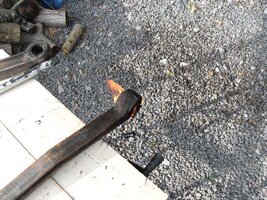
after the ball joint came the bushes. i decided to use the set on fire method. i simply held a blowtourch to the rubber until it caught fire.
after the rubber softened i used a piece of pipe to push the inner metal sleeves out and then a hammer and punch to knock out the remaining sleeve.
next ive got to clean the arms up and give them a good paint up.
after the rubber softened i used a piece of pipe to push the inner metal sleeves out and then a hammer and punch to knock out the remaining sleeve.
next ive got to clean the arms up and give them a good paint up.
Attachments
listerd
Overdrive!
well i've painted the A frame parts, put a new A Frame ball joint in and put one bush in one of the A frame top links. i've got to send the other bush back as it's faulty.
i'm going away for a couple of weeks but i'll try and get some more pics up before i go away.
mmmmmmmmmmmmm kefalonia here we come..............
i'm going away for a couple of weeks but i'll try and get some more pics up before i go away.
mmmmmmmmmmmmm kefalonia here we come..............
listerd
Overdrive!
well i'm back..
i've got the other bush into the A frame arms and the new a frame ball joint in and all bolted back together and i've got the seat base cleaned and undercoated and the rear tub underside is all undercoated. just need to start top coating.
i'll get some photos up at the weekend.
i've got the other bush into the A frame arms and the new a frame ball joint in and all bolted back together and i've got the seat base cleaned and undercoated and the rear tub underside is all undercoated. just need to start top coating.
i'll get some photos up at the weekend.
listerd
Overdrive!
oh forgot to say i've made a reartub crossmember out of stainless steel. rather than pay the 80 odd gold nuggets the local dealer wanted.
i'm now considering making some stainless seat base sides but time is agianst me so i may just get some from yrm metal people.
going to look at a house tomorrow eve so i'll try to the pics up at the weekend.
i'm now considering making some stainless seat base sides but time is agianst me so i may just get some from yrm metal people.
going to look at a house tomorrow eve so i'll try to the pics up at the weekend.
nobber
Extreme Landy Fan
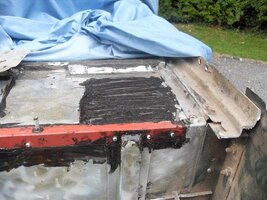
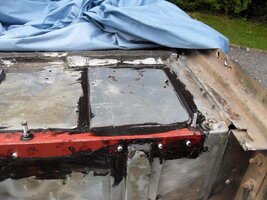
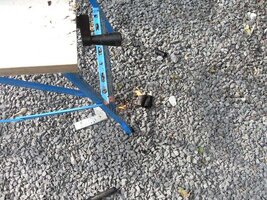
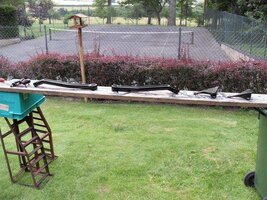
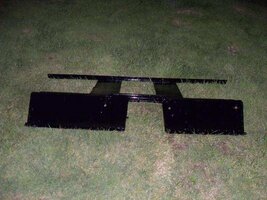
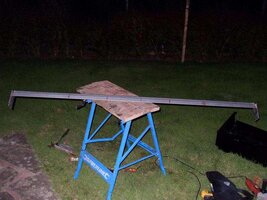
well i need to replace the rear body rail (see pic 1. it's the rail that bolts to the rear crossmember and across the rear of the body.) and seeing as my local deal wants £84 plus vat and theres no replacement part i've decided to make one from stainless steel.
my friends got a sheet bender but not sure it's long enough so may need to make it out of two pieces and weld together.
i'm going to put some plates on the end to give the rear quarters a bit more strength.
heres my first drawing (see pic 2)
i'll get some pics when its made.
are you buying from a main dealer?
this part was knocking around on e bay when i restored my 85 90 , it was around 20 quid i think , if i am remembering right. do you have a parts manual? if not and you need any part numbers drop me a pm and i will get them for you.
i also had the same problems with my tub , rot in exactly the same mounting points. i used old floor plates to provide me with some nice thick aluminium to fabricate patches from and i used tigerseal and rivets to fix the plates to the tub with.
https://www.lrukforums.com/showthread.php?t=75716&highlight=nobbers
most parts i sourced were second hand ,well where i didnt need to use new ones so my costs were kept down to a level that was easy to swallow and i was recycling old vehicles parts at the same time.
i managed to pick up a 'like new' seat box for 15 quid which was much easier than repairing my rotton one. i just put wanted ads on the forums for bits that i needed.
where metal meets aluminium i used nylon washers or sheets of plastic to seperate both metals , this applys to stainless as well.
your project is looking good though ,new cross member looks the dogs doodlies.
listerd
Overdrive!
cheers nobber.
i've got admit the crossmember is bombproof. hopefully i'll be able to get the rest of the chassis repairs upto that level.
where the alli and steel meet there will good layers of paint and waxoil to stop. corrosion killing the landy again.
A friend of mine is into the building trade and build mainly wharehouse complexs so he gets loads of spare ali road signs. he gave me a couple and they're great for repair plates. they're plastic coated as well so they give a extra layer of protection.

listerd
Overdrive!
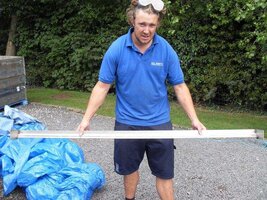
yer i was lucky with the rear member. i friend of mine had a sliver of stainless left over from a job and had access to as former long enough to do it one piece i nearly had to do it in two sections and weld them together.
its only three folds and a small piece of metal so you should be able to get one made up at any decent engineering place.
its only three folds and a small piece of metal so you should be able to get one made up at any decent engineering place.
listerd
Overdrive!
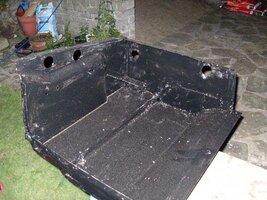
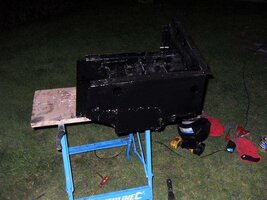
well at the week end i managed to get the seat box painted and the battery box repaired and undercoated.
yesterday i gave the battery box its firts top coat.
i've also started to paint the underside of the rear tub. its had two coates of primer.
and i've started with the top coat.
so nothing exciting.
next i've got to start prepping for the rear chassis welding marathon.
which should make for a nice bank holiday.
i'll try and get some more pics for ya in the next couple of days.
listerd
Overdrive!
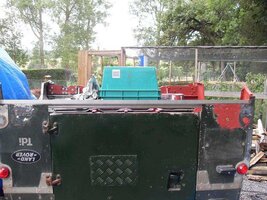
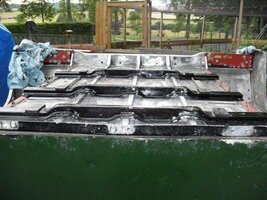
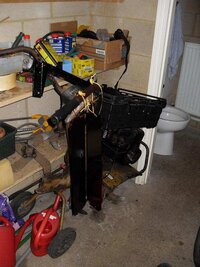
well heres some pics. nothing too exciting.
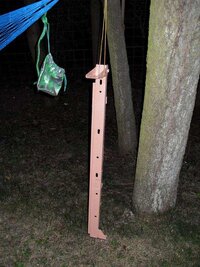
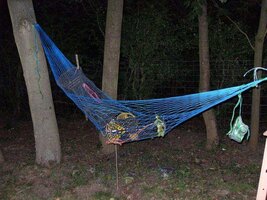
just the battery box i repaired and painted. the seat box and a few other bits including my hammock with some crayfish traps waiting for a bbq.
i also measured and drilled the rear tub crossmember and the A frame all ready to go.
Enjoy
just the battery box i repaired and painted. the seat box and a few other bits including my hammock with some crayfish traps waiting for a bbq.
i also measured and drilled the rear tub crossmember and the A frame all ready to go.
Enjoy
Attachments


listerd
Overdrive!
yep. what we do is me and my mate take the traps down early in the morning or the night before then we have a landy session followed by bbq'd crayfish with honey garlic and chilli dip.
or if we've got time we put the pigeon decoys out and shoot a few for the pan. mmmmm free food
or if we've got time we put the pigeon decoys out and shoot a few for the pan. mmmmm free food
series3100
Big Landy Fan
Oh you jammy sod!yep. what we do is me and my mate take the traps down early in the morning or the night before then we have a landy session followed by bbq'd crayfish with honey garlic and chilli dip.
or if we've got time we put the pigeon decoys out and shoot a few for the pan. mmmmm free food
!Brian