Right then winter is upon us once again and I got to thinking about helping my defender 200tdi heat up quicker and therefore getting more heat quicker in to the cab. The most obvious way to do this is to restrict the amount of cold air flowing through the radiator so hot water is re-circulated around the engine rather than cooled water. This is traditionally done with a radiator muff (aka. Rad muff or snow blind or rad cover), these are removable covers that fit to the radiator grilles and incorporate an adjustable flap which allows the amount of air reaching the radiator to be adjusted. So I went in search of one and was quite shocked to find that companies charge £50+ for one and that is usually excluding VAT and P+P. Shock Horror! Even on ebay they were going for that price second hand so I mulled it over in my head for a while!
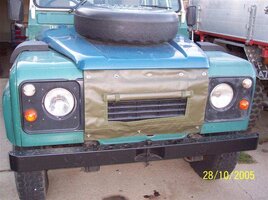
After talking to people and getting some ideas flowing I decided to make my own muff because I could definitely make it cheaper and hopefully it'd look ok too and this is how I did it!
Equipment;
1x Tesco value rubber car mat (although any piece of rubber will do)
20x cable ties
4x washers
40cm of plastic coated garden wire
1x webbing belt and quick clip (came from an old pair of shorts, knew I was saving the belt for sommat useful!! ), but any piece of cord will do!
Tools;
Stanley knife
Pliers
wire cutters
Time = approximately 20 minutes
Cost = approximately £2 (less than a fiver for sure!)
Procedure;
1) Remove grille off vehicle, place rubber mat on the grille and position it to the left of the grille.
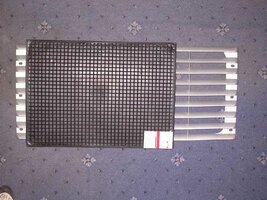
So you should have about 1/3 to 1/4 of the grille uncovered on the right hand side. This is to let air to the intercooler.
NB. If your vehicle do not have an intercooler (such as a V8, TD or N/A) then a larger piece of rubber will be needed to cover the whole grille.
2) The size of the flap depends on how large your mat is, but for mine I decided on 5 squares (NB. 1 square = approx. 1cm) in from the sides, 3 squares from the bottom and 5 squares from the top.
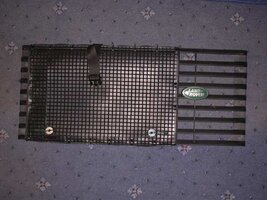
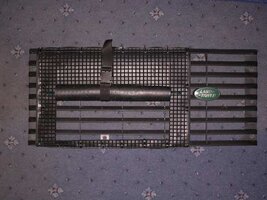

This seemed the right size to allow for the muff edges to be cable tied to the grille whilst allowing for a good sized flap.
3) The flap is held in place by 2 wire hooks that slot in to the edges of the muff and also when in 1/2 or fully open by the webbing strap. The hooks are very simple to make and consist of 2 washers and about 20cm of wire per side. The washers are to strengthen the rubber flap just so the hook isn't ripped out.

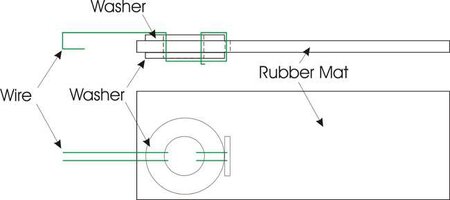
It is simple but affective!
Cut 2 slits in to the rubber mat (2 squares in) that correspond to the position of the hooks when in the closed position and also another 2 slits for the half open position. There are no slits in the fully open position because the strap takes the weight.
4) Then cable tie the muff to the grille in 20 places (8 along the top and bottom and 4 along the sides), but not that many is needed, I tend to get carried away with cable ties but I think it looks neat and tidy!
5) The flap supporting strap is fed up under the fifth horizontal bar behind the grille and then up over the top of the grille and muff. This allows the flap to be held open simply and quickly. When the flap is down the buckle of the strap is pinned behind the flap whilst the other end just dangles down in front.

6) Re-attach the grille (and new muff) to the front of your vehicle and your done!
Have a play with it and admire your work!!

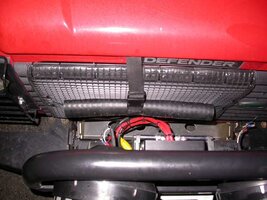


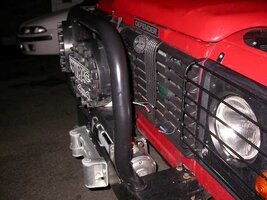
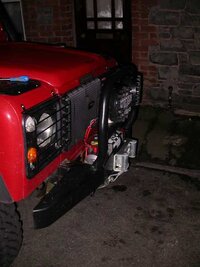
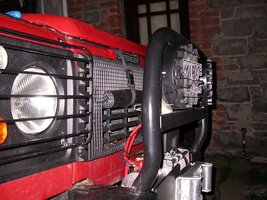
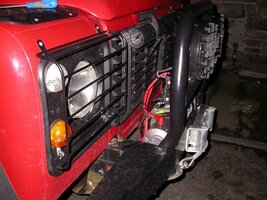
So you see you do not have to spend a fortune buying one from a company or off of ebay (which go for anything between 40 - 70 pounds!!! ) when you can make one that looks great (IMHO anyway!!) and works really really well!
I made the rad muff one evening and it took me 15mins to do! A seriously quick and cheap mod! Total cost was about £2!
Plus the great thing is that the engine from below zero got to hot in 1/4 of the time it usually takes, which well impressed me!! Lovely and toasty warm in the engine bay and cab!!
I will shortly be putting a bonnet seal together which will block off the gaps between the bonnet and wings, stopping the heat from escaping out of the HUGE gaps. Once that is done Eva will be even warmer!
Oh and I am still chuffed with how well it works and looks!

After talking to people and getting some ideas flowing I decided to make my own muff because I could definitely make it cheaper and hopefully it'd look ok too and this is how I did it!
Equipment;
1x Tesco value rubber car mat (although any piece of rubber will do)
20x cable ties
4x washers
40cm of plastic coated garden wire
1x webbing belt and quick clip (came from an old pair of shorts, knew I was saving the belt for sommat useful!! ), but any piece of cord will do!
Tools;
Stanley knife
Pliers
wire cutters
Time = approximately 20 minutes
Cost = approximately £2 (less than a fiver for sure!)
Procedure;
1) Remove grille off vehicle, place rubber mat on the grille and position it to the left of the grille.

So you should have about 1/3 to 1/4 of the grille uncovered on the right hand side. This is to let air to the intercooler.
NB. If your vehicle do not have an intercooler (such as a V8, TD or N/A) then a larger piece of rubber will be needed to cover the whole grille.
2) The size of the flap depends on how large your mat is, but for mine I decided on 5 squares (NB. 1 square = approx. 1cm) in from the sides, 3 squares from the bottom and 5 squares from the top.


This seemed the right size to allow for the muff edges to be cable tied to the grille whilst allowing for a good sized flap.
3) The flap is held in place by 2 wire hooks that slot in to the edges of the muff and also when in 1/2 or fully open by the webbing strap. The hooks are very simple to make and consist of 2 washers and about 20cm of wire per side. The washers are to strengthen the rubber flap just so the hook isn't ripped out.


It is simple but affective!
Cut 2 slits in to the rubber mat (2 squares in) that correspond to the position of the hooks when in the closed position and also another 2 slits for the half open position. There are no slits in the fully open position because the strap takes the weight.
4) Then cable tie the muff to the grille in 20 places (8 along the top and bottom and 4 along the sides), but not that many is needed, I tend to get carried away with cable ties but I think it looks neat and tidy!
5) The flap supporting strap is fed up under the fifth horizontal bar behind the grille and then up over the top of the grille and muff. This allows the flap to be held open simply and quickly. When the flap is down the buckle of the strap is pinned behind the flap whilst the other end just dangles down in front.

6) Re-attach the grille (and new muff) to the front of your vehicle and your done!
Have a play with it and admire your work!!


So you see you do not have to spend a fortune buying one from a company or off of ebay (which go for anything between 40 - 70 pounds!!! ) when you can make one that looks great (IMHO anyway!!) and works really really well!
I made the rad muff one evening and it took me 15mins to do! A seriously quick and cheap mod! Total cost was about £2!
Plus the great thing is that the engine from below zero got to hot in 1/4 of the time it usually takes, which well impressed me!! Lovely and toasty warm in the engine bay and cab!!
I will shortly be putting a bonnet seal together which will block off the gaps between the bonnet and wings, stopping the heat from escaping out of the HUGE gaps. Once that is done Eva will be even warmer!
Oh and I am still chuffed with how well it works and looks!
