Well last weekend I decided to fit the rear cranked trailing arms I bought from Gwyn Lewis, gotta love Birthday money!
I have a 2" lift on Eva so the standard arms angle down at a steep angle and put alot of pressure and wear on the bushes.
I have been looking at cranked rear arms for quite some time now and there are many companies selling them, Britpart, Bearmach, Equipe to name a few. They all vary very little from each other, well apart from price that is! Some can be very very expensive IMHO! The weekend before last I popped down to Gwyn's unit near Welshpool and had a long chat with him, I also got my grubby mitts on some of his other wears and of course the cranked arms. From the moment I picked them up I could tell they were a serious piece of kit - So I parted with the cash happy in the knowledge I was buying quality items.
The Kit (what comes with them)
2x Cranked arms
2x 1-1/16ths nyloc nut (I will find the metric equivilant later)
2x Axle to arm bushes (already installed)
2x M16 bolts
2x M16 nyloc nuts
Also I bought 2x arm to chassis bushes from Gwyn and they came with the 6x nuts and bolts to atach them to the chassis. Change them whilst you are down there!
Tools
Socket set with: 17mm, 24mm, 1-1/16th"
Spanners: 17mm and 24mm
Breaker bar
Copper slip grease
Wire brush
2 ton trolly jack
Axle stands
Hi-lift jack
and of course Land Rover Special Tool No.1 (Lump Hammer)
Fitting
When doing a job such as this take your time and do it right first time.
1) Chock front wheels, place trolly jack under diff casing and jack it up enough to take the weight of the right hand rear wheel (wheel nearest the diff casing) - the diff casing is not central and the wheel nearest it will lift off the ground first.
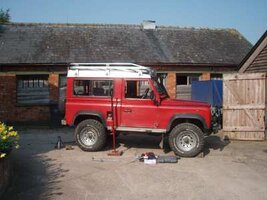
2) Undo the wheel nuts. Jack the wheel off the ground and remove.
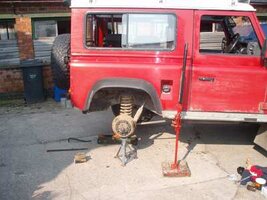
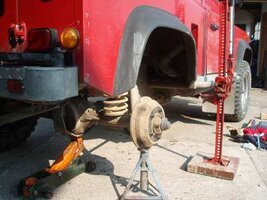
3) Either place an axle stand underneath the chassis or use a hi-lift jack to take the weight of the vehicle. You can also stick another axle stand underneath the drum of the rear brake. I did this as my trolly jack slowly lowers.
4) Using a 1-1/16ths socket undo the big nut on the end of the trailing arm. These can be quite hard to get off so you may need to use a breaker

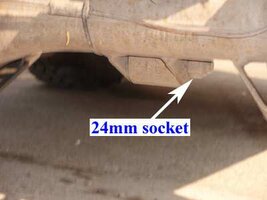
5) Using a 24mm spanner and 24mm socket remove the nut and bolt from the axle end of the trailing arm. The bolt can be difficult, so tap the thread end until flush with the axle mount. Then take the open ended spanner and hook it on to the underside of the head of the bolt and tap the bolt out with LR special tool No.1.
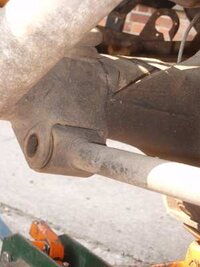
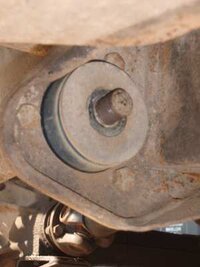
6) Remove trailing arm. You may need the LR special tool No.1 to get the axle end to drop. Then pull out of the chassis bush. Put to one side.
7) Using a 17mm spanner and socket undo the 3 pairs of nuts and bolts holding the chassis mounted bolts in place. Remove chassis bush.
8) With a wire brush clean up the axle and chassis mounts and apply a smear of copper slip to the mating surfaces.
9) Take new chassis bush and smear the internal tube with copper slip and also the mating surfaces. Grease the 3 new pairs of bolts and fix the bush in place - It mounts on the rear face of the chassis mount and protrudes through to the front.
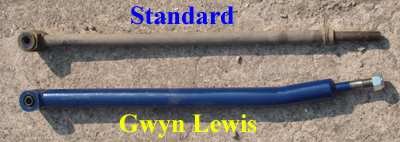
10) Grease the new cranked rear arm up, internal axle bush, chassis end thread and rod and all other mating
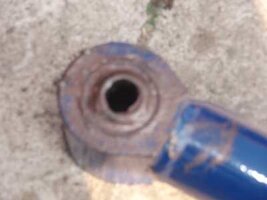
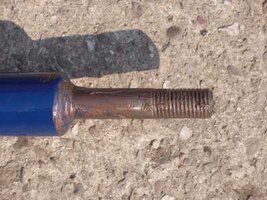
11) Slot threaded end of the arm through the middle of the chassis bush.
12) Raise the arm in to the axle mount and slot the retaining bolt in to place through the bush in the trailing arm. Using a 24mm spanner and socket tighten the axle end first.
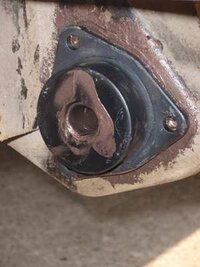
13) Using a 1-1/16ths socket tighten up the chassis end.
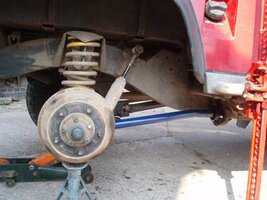
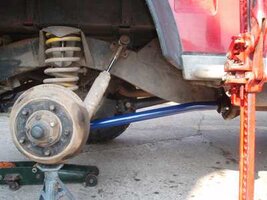
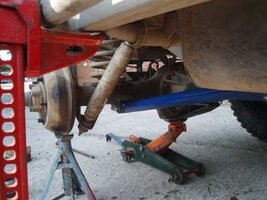

14) Clean up any wayward grease, replace wheel, remove axle stands and lower to ground. Done!
Now for the other side. Pretty much the same procedure except jack the axle up to the left of the diff casing so as to raise just the one wheel.
Not a difficult job this and certainly one even a complete novice can do without help.
The difference? Well the ride quality on the rear end is superb now, I mean really great! The chassis bush isn't stressed at all at rest, unlike without the cranked arms fitted.
As for articulation, well the limiting factor now is the length of the shock absorbers!
Some pics of Eva flexing with the new arms on.

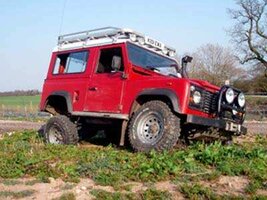
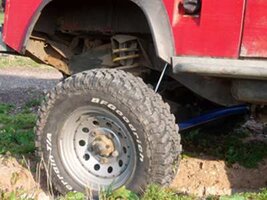
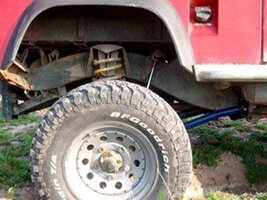
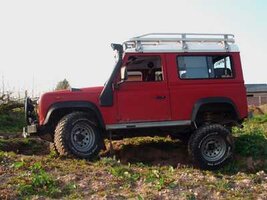

Even I make a balls of it now and again - got nicely wedged in this trough!!! Oh well!
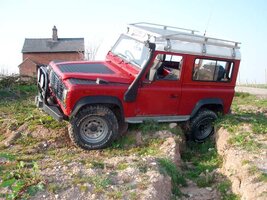
I have a 2" lift on Eva so the standard arms angle down at a steep angle and put alot of pressure and wear on the bushes.
I have been looking at cranked rear arms for quite some time now and there are many companies selling them, Britpart, Bearmach, Equipe to name a few. They all vary very little from each other, well apart from price that is! Some can be very very expensive IMHO!
The Kit (what comes with them)
2x Cranked arms
2x 1-1/16ths nyloc nut (I will find the metric equivilant later)
2x Axle to arm bushes (already installed)
2x M16 bolts
2x M16 nyloc nuts
Also I bought 2x arm to chassis bushes from Gwyn and they came with the 6x nuts and bolts to atach them to the chassis. Change them whilst you are down there!
Tools
Socket set with: 17mm, 24mm, 1-1/16th"
Spanners: 17mm and 24mm
Breaker bar
Copper slip grease
Wire brush
2 ton trolly jack
Axle stands
Hi-lift jack
and of course Land Rover Special Tool No.1 (Lump Hammer)
Fitting
When doing a job such as this take your time and do it right first time.
1) Chock front wheels, place trolly jack under diff casing and jack it up enough to take the weight of the right hand rear wheel (wheel nearest the diff casing) - the diff casing is not central and the wheel nearest it will lift off the ground first.

2) Undo the wheel nuts. Jack the wheel off the ground and remove.


3) Either place an axle stand underneath the chassis or use a hi-lift jack to take the weight of the vehicle. You can also stick another axle stand underneath the drum of the rear brake. I did this as my trolly jack slowly lowers.
4) Using a 1-1/16ths socket undo the big nut on the end of the trailing arm. These can be quite hard to get off so you may need to use a breaker


5) Using a 24mm spanner and 24mm socket remove the nut and bolt from the axle end of the trailing arm. The bolt can be difficult, so tap the thread end until flush with the axle mount. Then take the open ended spanner and hook it on to the underside of the head of the bolt and tap the bolt out with LR special tool No.1.


6) Remove trailing arm. You may need the LR special tool No.1 to get the axle end to drop. Then pull out of the chassis bush. Put to one side.
7) Using a 17mm spanner and socket undo the 3 pairs of nuts and bolts holding the chassis mounted bolts in place. Remove chassis bush.
8) With a wire brush clean up the axle and chassis mounts and apply a smear of copper slip to the mating surfaces.
9) Take new chassis bush and smear the internal tube with copper slip and also the mating surfaces. Grease the 3 new pairs of bolts and fix the bush in place - It mounts on the rear face of the chassis mount and protrudes through to the front.

10) Grease the new cranked rear arm up, internal axle bush, chassis end thread and rod and all other mating


11) Slot threaded end of the arm through the middle of the chassis bush.
12) Raise the arm in to the axle mount and slot the retaining bolt in to place through the bush in the trailing arm. Using a 24mm spanner and socket tighten the axle end first.

13) Using a 1-1/16ths socket tighten up the chassis end.


14) Clean up any wayward grease, replace wheel, remove axle stands and lower to ground. Done!
Now for the other side. Pretty much the same procedure except jack the axle up to the left of the diff casing so as to raise just the one wheel.
Not a difficult job this and certainly one even a complete novice can do without help.
The difference? Well the ride quality on the rear end is superb now, I mean really great! The chassis bush isn't stressed at all at rest, unlike without the cranked arms fitted.
As for articulation, well the limiting factor now is the length of the shock absorbers!
Some pics of Eva flexing with the new arms on.


Even I make a balls of it now and again - got nicely wedged in this trough!!! Oh well!

