• Welcome to the Land Rover UK Forums

    You are currently viewing the site as a guest and some content may not be available to you.

    Registration is quick and easy and will give you full access to the site and allow you to ask questions or make comments and join in on the conversation. If you would like to register then please Register Now

What did you do to your Disco today?

Today i read the ecu map file and made a note of the EKA code just in case.
Had a wander through the settings to see if i could see any readings or settings for the powerfold wing mirrors i fitted.
Nothing
Mirrors bolted on, plugged into door loom, ecu. Fitted / connected and the folding mirror switch plugged in. Action = zero though normal up/down and in/out adjustemnts work normally…..hmm
 
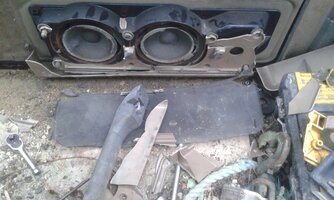
back door would not open on my D1 ,back full of stuff ,only just reached in ,quite a difficult job when it cant be reached ,kneeling on things ,cutting my fingers trying to get the handle and pannel off , red mist got me ,handle makes a good club to get the speaker cover off ,then a kicking to loosen the speakers ,dont need them as no radio ,rip the pannel off ,door opened , a pannel and handle of one of the donors later
 

Attachments

  • 20240214_115524.jpg
    20240214_115524.jpg
    285.3 KB · Views: 27
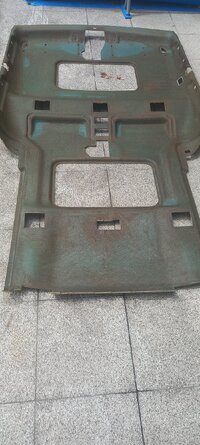
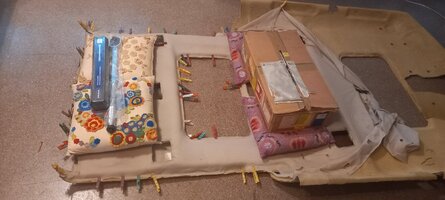
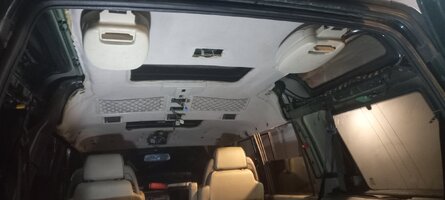
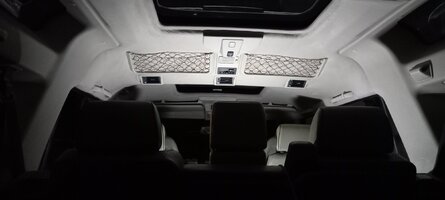
Last wekend I dismantled headliner, washed the exterior fabric, eliminated the degraded foam, and using 3M spray glued a 3mm thick sponge, and the original fabric again. I mounted it together again quickly, since by miracle it doesn't rain inside on my D2.
 

Attachments

  • 20240210_134942.jpg
    20240210_134942.jpg
    429.9 KB · Views: 21
  • 20240211_175755.jpg
    20240211_175755.jpg
    253.1 KB · Views: 20
  • 20240212_222830.jpg
    20240212_222830.jpg
    145.7 KB · Views: 18
  • 20240217_015123.jpg
    20240217_015123.jpg
    105 KB · Views: 17
Most people replace the fabric so its good to know you can wash it successfully!
It's a curious way to go seeing as it's a foam backed fabric. The perished foam does of course leave the cloth behind, so replacing with a separate new foam layer is an option but does seem an awful faff.
 
It's a curious way to go seeing as it's a foam backed fabric. The perished foam does of course leave the cloth behind, so replacing with a separate new foam layer is an option but does seem an awful faff.
Unfortunatelly there are some raw materials that are easily available in developed world, but not here. If not, there is this way, a little bit better than paint, the most used way to repair roof lining here.
Regards
 
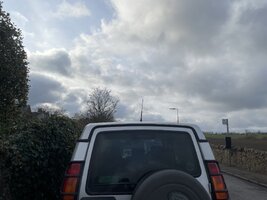
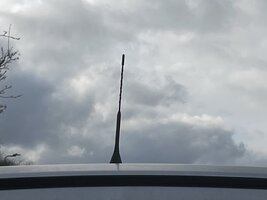
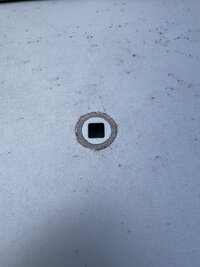
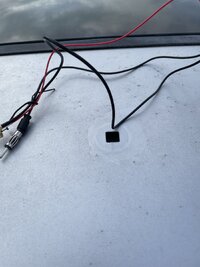
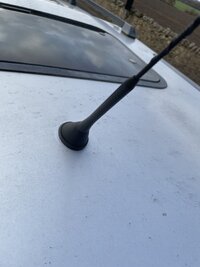
Fitted the dab roof aerial Ive been meaning to get round to
Not too bad a job to do.
Unbolt the blanking plug ( finger tight ! ) then feed the cables in…a little seamsealer on the aerial base after cleaning the roof.
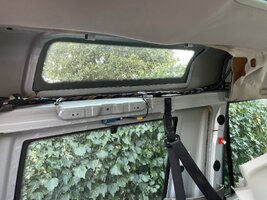
We get enough leaks without making more. Cables run to the left side along the edge if the roof biscuit then along the existing cabling run.
Power picked up from the side window aerial amp and the dab/ normal cables run along the top of the rear passenger door opening / biscuit edge.
Pass it through the B post finisher then al ong the top of the front passenger door opening and down the A post inside that trim. Feed tthrough the side of the dash and into the area behind the glovebox with about 1m from a 5m cable length left.
Total time 30mins…probably less second time if I need to go in again.
Looks fine. Next heavy rain will tell me if all is well.
Dab adapter on the way so will try it all out shortly.
Thanks to Cliff for photos that showed this area before i started and made the job easy.
 

Attachments

  • IMG_3419.jpeg
    IMG_3419.jpeg
    226.4 KB · Views: 10
  • IMG_3420.jpeg
    IMG_3420.jpeg
    127.6 KB · Views: 16
  • IMG_3415.jpeg
    IMG_3415.jpeg
    339.3 KB · Views: 10
  • IMG_3417.jpeg
    IMG_3417.jpeg
    287.2 KB · Views: 9
  • IMG_3418.jpeg
    IMG_3418.jpeg
    221.7 KB · Views: 13
  • IMG_3416.jpeg
    IMG_3416.jpeg
    405.6 KB · Views: 16
And todays little job was finishing off routing the dab aerial lead behind the glovebox and down to the dab adaptor.
Its a POP dab adaptor which was on cheap on ebay. £40. Initially its just fitted with power from the cigarette lighter to usb to adaptor.
The adaptor sends the audio to the radio on a chosen FM frequency basically as a local fm station. It. displays DAB+ mode on the radio cassette display which is nice.
Will run it for a bit and see if the audio is ok like this as it means i can keep the cd changer as well!
If its not good enough i can replace the changer link with an aux in adapter but i will lose the cdchange which would be a pity.
Dab is more useful though.
The pop unit tuned in easily and ive got all the rock stations etc set in memory already.
Only bit of headscratching was the POP unit comes by default with the menus in swedish.
It can be reset to english but its not immediately obvious how so some fiddling was involved.
Job done though and looks very neat. Unit is mounted down on the warning label for the hi/lo on the centre console
Nice little job done for now.
 
I use a similar device including bluetooth and microphone to attend telephone calls. This device runs well, but in many urban places gets interference from local FM stations. Would be perfect if its aerial could be connected out in order to do the same as you
 
Funnily enough while out visiting today i stopped at some traffic lights and planet rock was replaced by some american droning on about freedum and trump……car next to me at the traffic lights obviously had their gizmo set on the same frequency. Planet rock was reinstated when they were about 20feet away…lol
 
New allisport intercooler fitted. Another 20 minute job that takes longer than you think.
The old boost hoses were 20 year old originals and welded irrevocably to the original cooler.
The intercooler looks in not bad condition but the aircon hear exchanger has definitely seen better days.
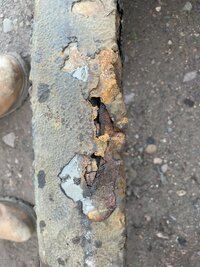
Ill keep an eye out for a better one and the mounting frame ( veeeery rusty)

A youtube video reckoned that there was enough space to get the intecooler in without removing the viscous fan.
Only if you are prepared to use crowbars and hammers….thats not me.
Job all done, new hoses in place, intercooler fitted and all bolts replaced with a light copperease coat, nipped up (4th hose spare?) and a quick road test.
Surprisingly straightforward job on such an old car considering all the bolts n brackets catch the worst of the weather.
 
Back
Top Bottom